A home pedicure usually starts with good intentions and ends with polish on the cuticles, uneven nail shapes, and heels that feel rough again the next morning. The problem isn’t a lack of expensive tools. It’s doing the right steps in the wrong order—or removing far more skin than your feet can comfortably handle.
This Pedicure at Home Salon Quality Summer Feet Guide follows the same practical sequence that makes a professional pedicure look polished: soften just enough, remove loose roughness, shape carefully, moisturize the skin, then remove oil from the nails before applying color.
A salon-quality home pedicure comes down to preparation and restraint. Soak your feet briefly, file only softened rough skin, trim nails straight across, gently manage cuticles, moisturize thoroughly, and clean the nail plates before polish. Thin coats and enough drying time matter more than expensive products.
What You Actually Need for a Salon-Quality Pedicure
You don’t need a rolling cart full of tools. In fact, too many aggressive files, blades, and peeling products make it easier to damage the skin.
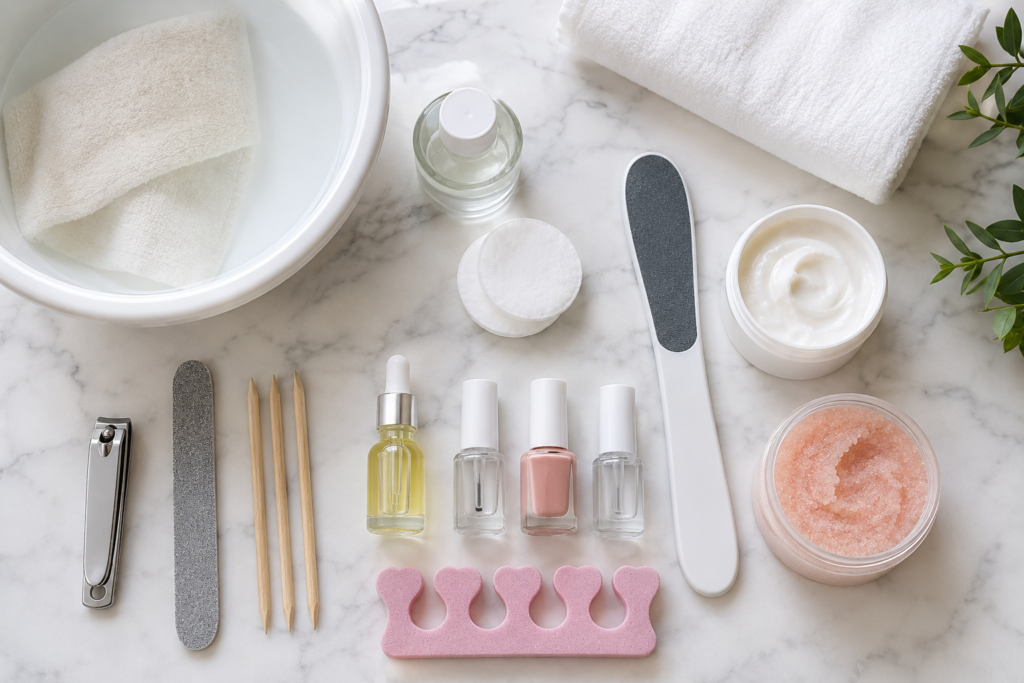
Gather these basics before you begin:
- Nail polish remover and cotton pads
- Nail clippers
- A medium-grit nail file
- A wooden cuticle stick or gentle cuticle pusher
- A basin or tub
- Mild body wash or fragrance-free cleanser
- A foot file with a fine or medium surface
- A simple foot scrub, if desired
- Thick foot cream
- Cuticle oil
- Toe separators
- Base coat, nail color, and top coat
Skip callus shavers and razor-style foot tools. They can remove living skin along with hardened skin, leaving the area sore and more prone to cracking.
You should also avoid sharing foot files, clippers, and cuticle tools. Clean reusable tools with soap and water, dry them fully, and disinfect them according to the manufacturer’s directions.
Step 1: Remove Old Polish Before You Soak
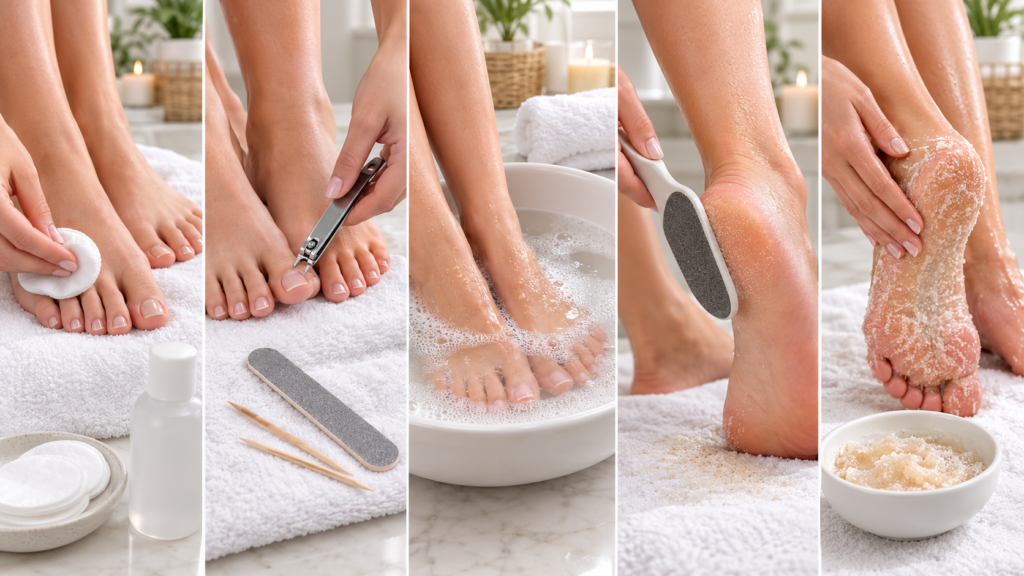
Take off every trace of old nail color while your feet are still dry. Polish remover works faster on dry nails, and you’ll get a clearer look at the nail plate before it becomes temporarily waterlogged.
Check for unusual discoloration, lifting, swelling, pain, or a nail that has become noticeably thicker. A fresh coat of polish can hide changes you should pay attention to.
If the nails look healthy, move on. If you notice persistent yellowing, crumbling, tenderness, or skin that appears infected, skip the cosmetic pedicure and see a qualified professional.
Step 2: Trim and Shape the Nails While They’re Dry
Cut toenails mostly straight across, leaving a small amount of white edge. Avoid cutting deeply into the corners, even when a rounded shape looks prettier. Digging into the sides can encourage the nail edge to press into the surrounding skin as it grows.
Use a file to soften sharp corners rather than clipping them away. File in controlled strokes until each nail has a neat square shape with lightly rounded edges.
I used to round the sides of my big toenails too aggressively because it made them look narrower. It also made the corners uncomfortable as they grew back. A soft-square shape isn’t as dramatic, but it wears better in closed shoes and is easier to maintain.
Watch Out: Don’t cut toenails extremely short before a vacation or a week of wearing sandals. Pressure from shoes, sand, and long walks can make freshly exposed nail edges feel tender.
Step 3: Soak for 5 to 10 Minutes—Not Half an Hour
Fill a basin with comfortably warm water and add a small amount of mild cleanser. Soak your feet for about 5 to 10 minutes.
The goal is to soften the outer layer of dry skin, not turn your feet pruney. Long, hot soaks swell the skin and nail plates with water. Once they dry, the temporary softness disappears, and nails may become more flexible and prone to peeling.
Some people add oils, bath salts, lemon juice, or baking soda. In my experience, plain warm water with a gentle cleanser works better because it softens without coating the nails or irritating small cracks.
Pat your feet dry, especially between the toes. Leave the heels slightly damp for filing.
Step 4: File Rough Heels Without Chasing Baby-Soft Skin
Use a clean foot file on the heels, outer edges, and any thick areas under the forefoot. Work in light strokes and check the skin often.
A callus forms where your foot deals with repeated pressure and friction. Removing the loose, thick surface can make the area feel smoother, but trying to erase every trace of firm skin can leave your feet sore. Your body may also respond to repeated over-filing by rebuilding that protective layer.
Stop when the skin feels smoother but still substantial. It shouldn’t look pink, shiny, or irritated.
I once treated foot filing like sanding furniture and kept going until every rough patch disappeared. My heels looked smooth for a day, then felt tender in shoes. The best result isn’t the thinnest skin—it’s comfortable skin with no sharp, flaky edges.
Pro Tip: File in several directions rather than rubbing one spot back and forth. This helps smooth the uneven edges of a callus without concentrating too much pressure in one area.
Step 5: Exfoliate the Skin, but Don’t Stack Treatments
A gentle foot scrub can remove softened flakes around the heels, ankles, and tops of the feet. Massage it over damp skin for about one minute, then rinse.
You don’t need a harsh, scratchy scrub after filing. The file already did most of the work. At this stage, the scrub is for polishing the surface and cleaning away loosened skin.
Don’t use a strong acid foot peel, gritty scrub, and foot file in the same session. These treatments remove dead skin in different ways, and stacking them can cause irritation or uneven peeling.
Chemical foot peels are better treated as a separate routine. They often take several days to start peeling and may continue for more than a week, so they’re a poor choice right before you want your feet to look neat in sandals.
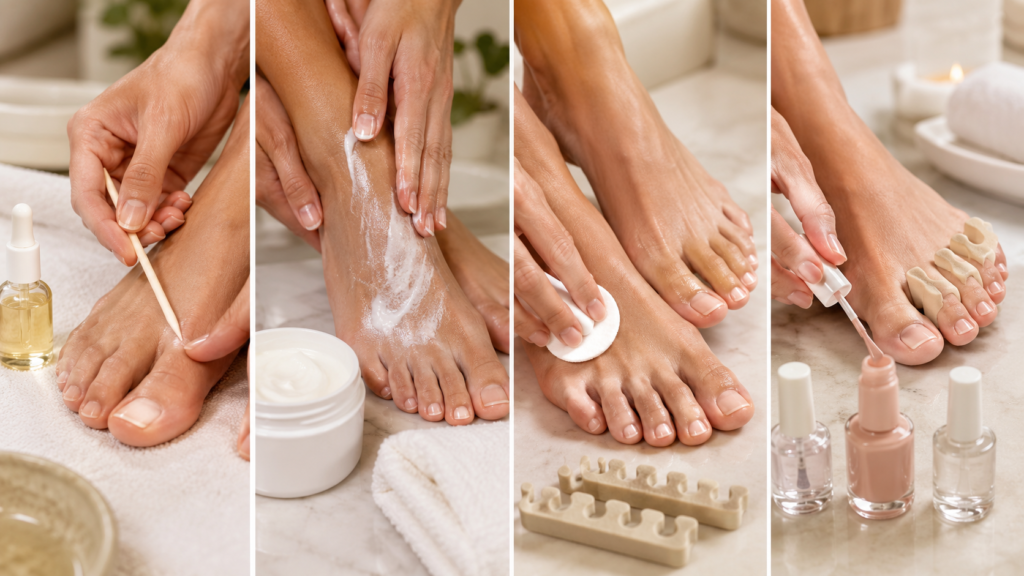
Step 6: Gently Tidy the Cuticles
Apply a small amount of cuticle softener or cuticle oil around each nail. Wait a minute, then gently push back the thin, softened tissue sitting on the nail plate.
The cuticle area helps protect the space where the nail grows. Cutting away living skin creates tiny openings and can lead to soreness or infection. Only remove a loose hangnail with clean nippers if it’s already detached from healthy skin.
Don’t scrape hard to create a large bare half-moon at the base of the nail. A clean pedicure should make the nail outline look tidy, not stripped.
Wipe away residue with a damp cloth when you’re finished.
Step 7: Moisturize While the Skin Is Still Slightly Damp
Massage a thick foot cream over the heels, soles, ankles, and tops of the feet. Look for moisturizing ingredients such as glycerin, petrolatum, ceramides, shea butter, or urea.
Urea is especially useful in foot creams because it attracts water while also helping soften thick, built-up skin. Lower-strength formulas work well for regular moisturizing, while stronger keratolytic creams may sting cracked or irritated skin.
Avoid putting heavy cream between the toes, where trapped moisture can create a damp environment. Keep that area clean and dry.
Let the cream sit for a few minutes. If your heels are very dry, apply a little more after the polish has fully hardened and wear breathable cotton socks overnight.
Step 8: Degrease the Nail Plates Before Polish
This small step is what separates a neat pedicure from polish that chips quickly.
Foot cream, cuticle oil, and soak residue leave an invisible film on the nails. Polish can’t grip that oily surface well, even when the nail looks clean.
Wrap a cotton pad around one finger, dampen it with nail polish remover or rubbing alcohol, and wipe each nail plate. Try not to touch the surrounding skin more than necessary, since remover can be drying.
The nails should look clean and matte before you apply the base coat.
Step 9: Apply Thin Polish Coats in the Right Order
Use toe separators or place small pieces of cotton between the toes.
Start with one thin layer of base coat. Base coat helps color adhere more evenly and can reduce staining from dark shades.
Apply the first color coat using three strokes: one down the center, then one along each side. Leave a hairline gap between the polish and the skin. This makes the nail shape look cleaner and prevents color from flooding the cuticles.
Wait about two minutes, then add a second thin coat. Thick coats may feel dry on top while staying soft underneath, which leads to dents hours later.
Finish with top coat and lightly sweep it across the free edge of each nail. Sealing the tip can slow down wear where polish usually chips first.
Good to Know: Nail polish doesn’t fully harden the moment it feels dry. Avoid tight shoes, hot showers, and bed sheets pressing directly on the toes for several hours when possible.
How to Clean Up Polish Without Making a Bigger Mess
Dip a small angled brush or pointed cotton swab into polish remover. Blot off the excess, then trace around the nail where color touched the skin.
Use the brush like an eraser, not a paint mop. Too much remover can spread pigment into the sidewalls or dissolve the clean edge you just created.
Clean mistakes after the second color coat but before top coat. Once the outline looks neat, top coat can smooth the finish and seal everything together.
Why Your At-Home Pedicure Chips So Quickly
A home pedicure often fails because polish is applied over damp, flexible, or oily nails.
After soaking, the nail plate absorbs water and expands slightly. If you polish immediately, the nail later contracts as it dries. That movement can weaken the bond between the nail and polish.
You don’t have to wait hours after a short soak, but dry the nails well and remove surface oil before painting. Keep coats thin, allow a little time between them, and don’t apply foot cream over the nails afterward.
Another common issue is skipping base coat and replacing it with a clear top coat. These products aren’t identical. Base coat is designed to grip the nail, while top coat is designed to protect the color and create a smoother finish.
How to Keep Summer Feet Smooth Between Pedicures
The Pedicure at Home Salon Quality Summer Feet Guide works best when the full routine isn’t your only form of foot care.
Apply foot cream most nights, focusing on the heels and pressure points. Consistent moisturizing keeps the outer skin flexible, so it’s less likely to split into rough edges.
Use a fine foot file once a week on dry or slightly damp skin if needed. A few gentle passes work better than an aggressive monthly session.
Wear shoes that fit properly. No cream can fully prevent calluses if a sandal strap or narrow shoe rubs the same place every day.
Reapply top coat every few days if you want extra shine and protection. Keep each maintenance layer thin so the polish doesn’t become bulky.
When a DIY Pedicure Isn’t the Right Choice
Skip home filing and cuticle work if you have open cracks, bleeding, active blisters, inflamed skin, or signs of infection.
People with diabetes, reduced circulation, loss of sensation in the feet, or conditions that affect wound healing need more cautious foot care. Even a small cut can become a bigger problem when you can’t feel it clearly or heal normally.
See a healthcare or foot-care professional if you notice persistent pain, warmth, swelling, drainage, a changing dark mark under the nail, or a suspected ingrown toenail.
A cosmetic pedicure can improve how healthy feet look and feel. It won’t treat fungal infections, deep heel fissures, structural nail problems, or ongoing foot pain.