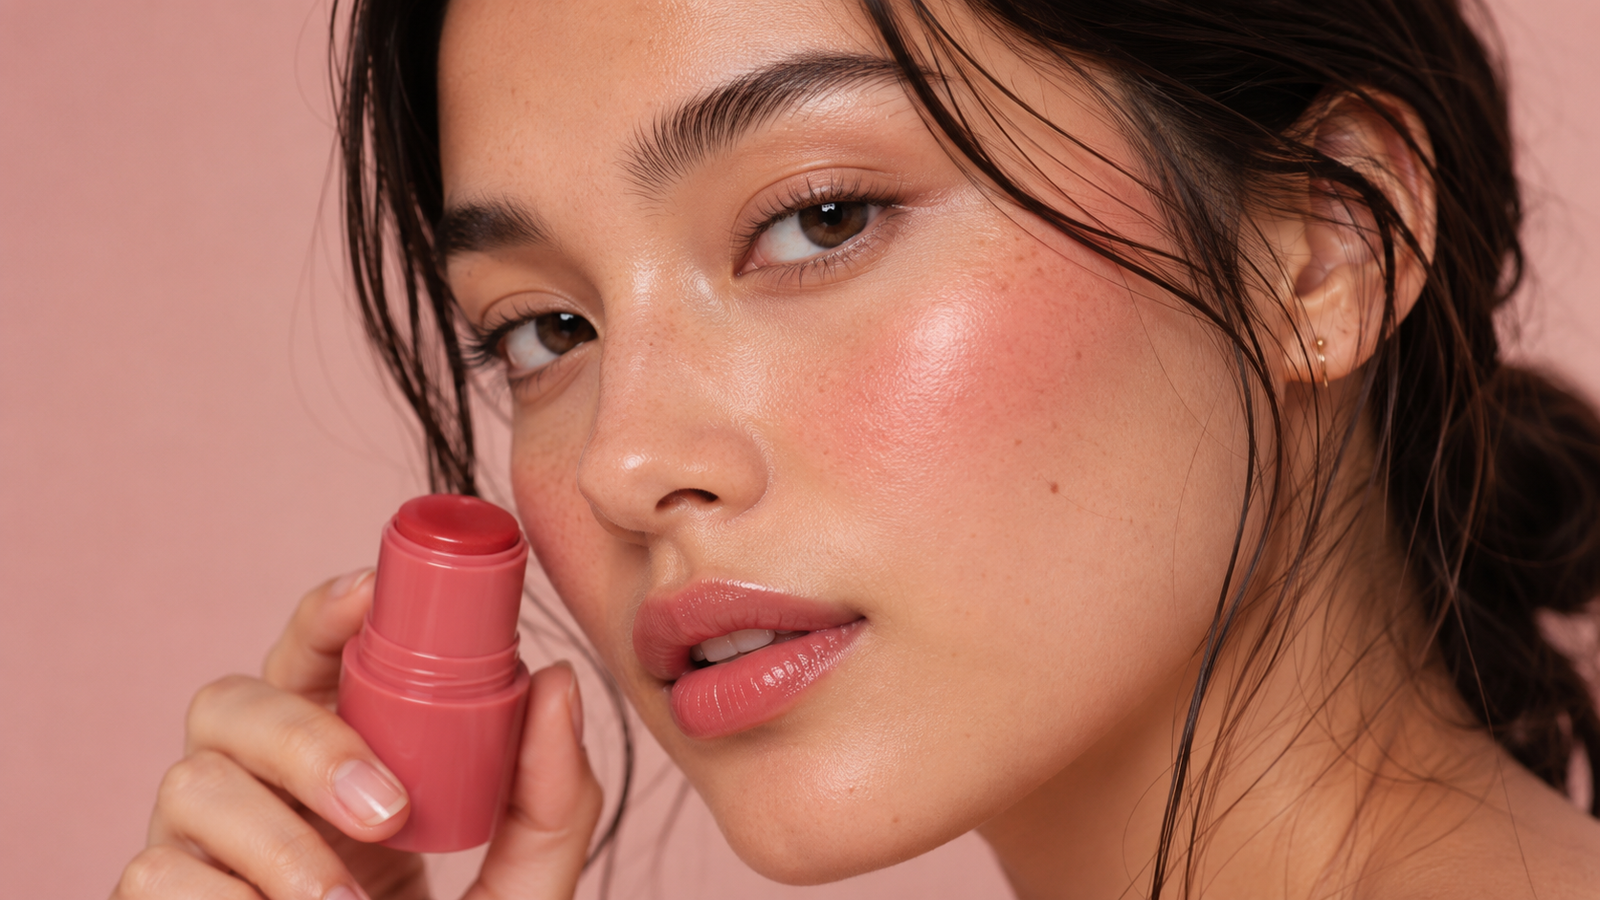
Jelly blush looks almost too playful to take seriously—until you see what it does on the skin. Instead of leaving a creamy layer or a visible powdery edge, it melts into the cheeks and leaves behind a sheer, translucent flush that looks surprisingly natural.
I learned the formula’s biggest downside on my first try. I swiped it across both cheeks, paused for a few seconds, and ended up with two bright streaks that had already started to stain. Unlike cream blush, jelly blush rewards speed, restraint, and a very light hand.
The Jelly Blush Trend and Why Your Cheeks Need It comes down to one real benefit: fresh, buildable color that lasts without feeling sticky, greasy, or heavy on the skin.
What Is Jelly Blush, Really?
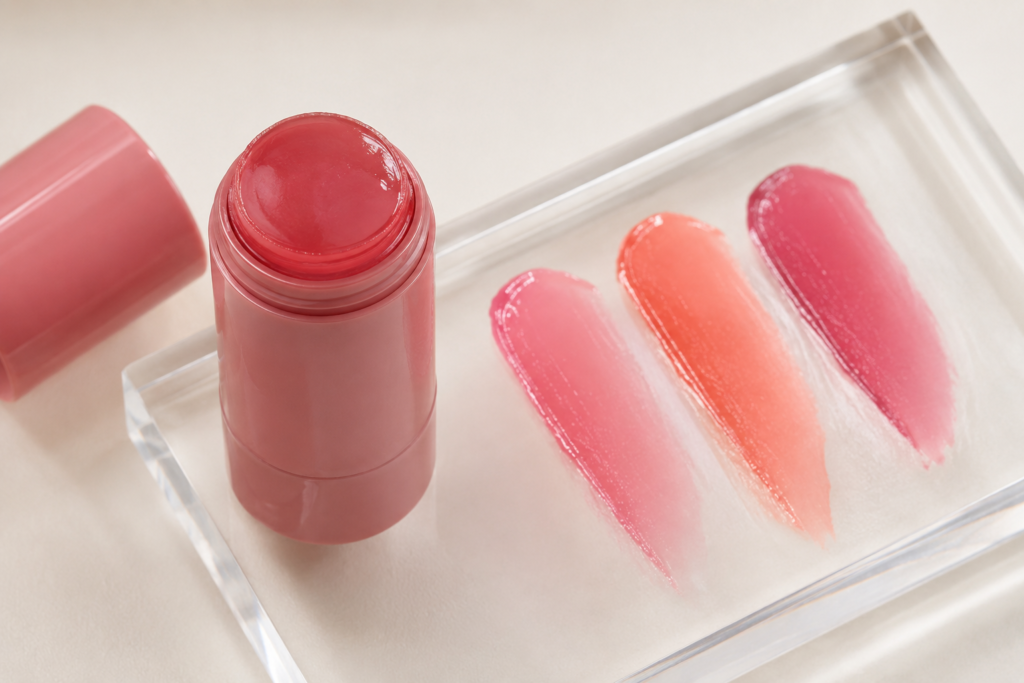
Jelly blush is a water-based gel cheek tint with a bouncy or solid texture. It spreads into a thin layer, then leaves behind sheer color as the watery part dries. The result looks more like a natural stain than a creamy coating, but you have to blend it quickly before the pigment sets.
Why Jelly Blush Looks Different From Regular Blush
Cream blush usually contains more oils, waxes, or emollients that give it slip. That slip makes the formula easy to move around, but it can also leave a visible creamy finish or shift as your skin becomes oily.
Jelly blush relies more heavily on water, humectants, gelling ingredients, and colorants. The water creates the fresh initial slip, while the gel structure keeps the product from behaving like a runny liquid tint.
Once the water begins to evaporate, the pigment remains on the skin. That’s why the texture can feel cooling for a few seconds and then seem almost weightless.
The real advantage isn’t that jelly blush treats your skin. It doesn’t replace moisturizer, improve your barrier, or hydrate deeply just because water appears near the top of the ingredient list. Its advantage is cosmetic: strong color payoff from a very thin layer.
The Jelly Blush Trend Creates a More Believable Flush
Many blushes look beautiful but still look like makeup. You can see where the powder begins, where the cream ends, or where an intense liquid pigment was blended across the cheek.
Jelly blush tends to remain slightly transparent. Your freckles, natural undertone, and skin texture can still show through it. The effect looks closer to the color your cheeks develop after a walk than a solid circle of pink pigment.
That transparency also makes bright shades easier to wear. A cherry-red stick may look alarming in the tube, but one light tap can soften into a clear rosy flush.
This is also what jelly blush won’t do: it won’t cover acne marks, blur pores, or correct uneven redness. It adds color without adding coverage. If your goal is a fully polished, perfected cheek, powder or cream blush may give you more control.
Jelly Blush, Cream Blush, or Liquid Blush?
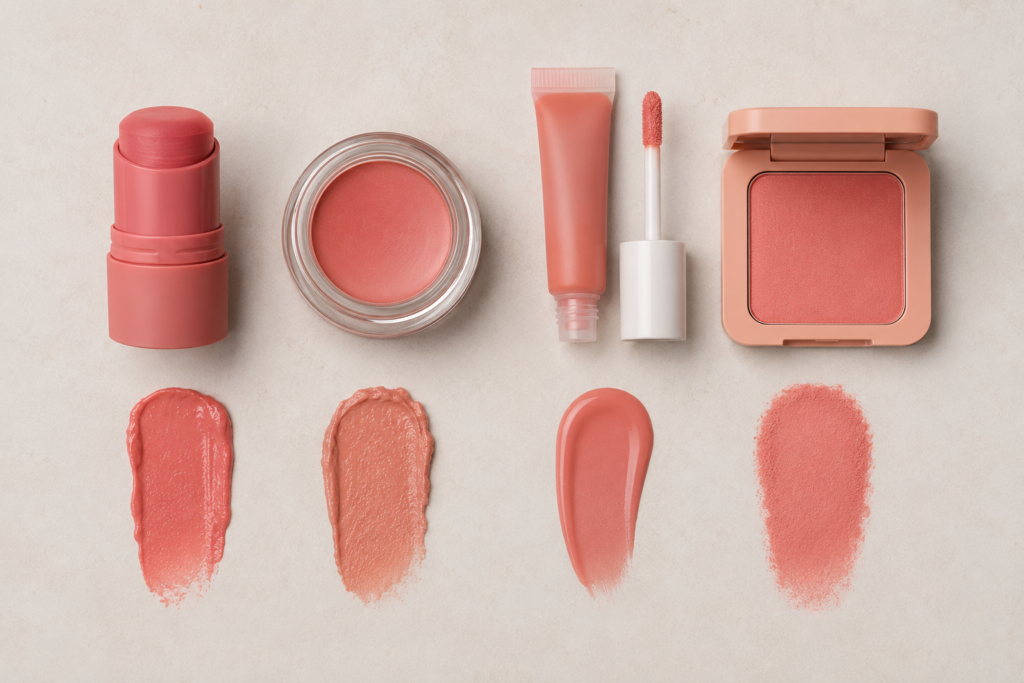
| Formula | Finish | Blending Time | Best For | Main Limitation |
|---|---|---|---|---|
| Jelly blush | Sheer, fresh, stain-like | Short | Lightweight makeup and lasting color | Can set unevenly |
| Cream blush | Soft, creamy, skin-like | Long | Dry skin and easy blending | May move on oily skin |
| Liquid blush | Sheer to intensely pigmented | Medium | Custom color and precise placement | Easy to overapply |
| Powder blush | Matte, satin, or luminous | Long | Oily skin and powdered makeup | Can emphasize dryness |
Jelly blush sits somewhere between a cheek stain and a cream stick. It gives you the controlled shape of a stick, but the finish behaves more like a watery tint.
It isn’t automatically better than every other blush format. It’s better when you want sheer color, minimal texture, and a finish that doesn’t stay creamy all day.
How to Apply Jelly Blush Without Patchy Cheeks
Let Your Skincare Set First
Jelly blush performs badly on two opposite surfaces: very dry skin and very wet skin.
If your cheeks are flaky, the tint can grab the driest areas and make them look darker. If your moisturizer or sunscreen is still slippery, the color can slide, separate, or gather around pores.
Complete your skincare, then wait until the surface feels comfortable rather than damp. Your skin shouldn’t feel tight, but it also shouldn’t feel coated in a fresh layer of product.
Don’t Swipe It Straight Across Your Face
A direct stripe deposits too much pigment in one place. By the time you reach the edge, the center may already be staining.
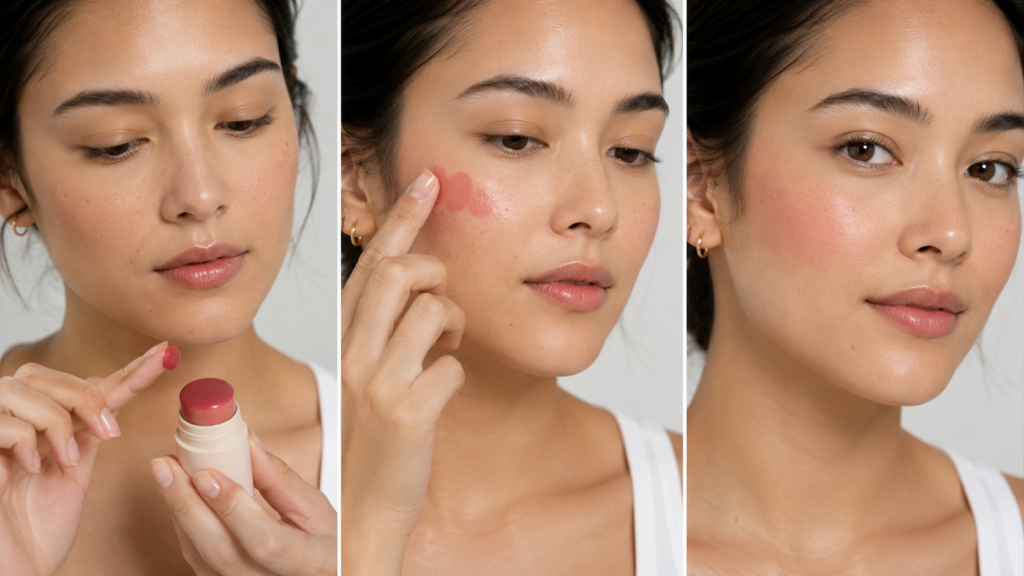
Tap the jelly blush once onto your fingertip or a compact synthetic brush. Press that small amount onto one cheek and begin blending immediately.
I get a smoother result with fingers because body warmth helps spread the watery gel before it sets. A brush works well when I want cleaner placement near the cheekbone.
Pro Tip: Finish one cheek completely before applying product to the other. Jelly blush rarely gives you enough working time to leave both sides waiting.
Press the Color Into the Skin
Use quick tapping motions rather than long rubbing strokes. Tapping spreads the pigment without dragging foundation away from the skin underneath.
Rubbing can create a pale patch in the center where the base makeup lifts, surrounded by a darker ring of blush. It’s one of the main reasons people think their jelly blush formula is defective.
A damp sponge can soften harsh edges, but it may absorb too much of a sheer product. Use it only after the main blending is finished.
Build the Color in Thin Layers
Let the first layer settle for 20 to 30 seconds before deciding that you need more. Jelly blush often appears brighter while wet, then softens slightly as it dries.
Add the second layer only to the area where you want the most color. For most people, that will be the fullest part of the cheek or the upper outer cheekbone.
Don’t cover the entire first layer again. Keeping the edges sheer is what makes the finish look natural.
Your Base Makeup Matters More Than You Think
Jelly blush usually performs best over bare skin, skin tint, light foundation, or a base that hasn’t been heavily powdered.
Powder creates a dry, absorbent surface. When a water-based stain touches it, the powder can soak up the moisture before you’ve had time to blend, leaving a dark dot or uneven edge.
If you need powder for oil control, apply the jelly blush first. Let it dry, then press a small amount of translucent powder around the cheek rather than directly over the strongest color.
Watch Out: Don’t keep adding skincare mist or setting spray while blending. Extra moisture can dilute the tint in one area and deepen it in another.
Full-coverage foundation creates a different problem. A firm swipe of jelly blush can pull the foundation away and expose the skin beneath it. Transfer the product to a finger or brush first so you don’t press the stick directly into the base.
How to Choose a Jelly Blush Shade
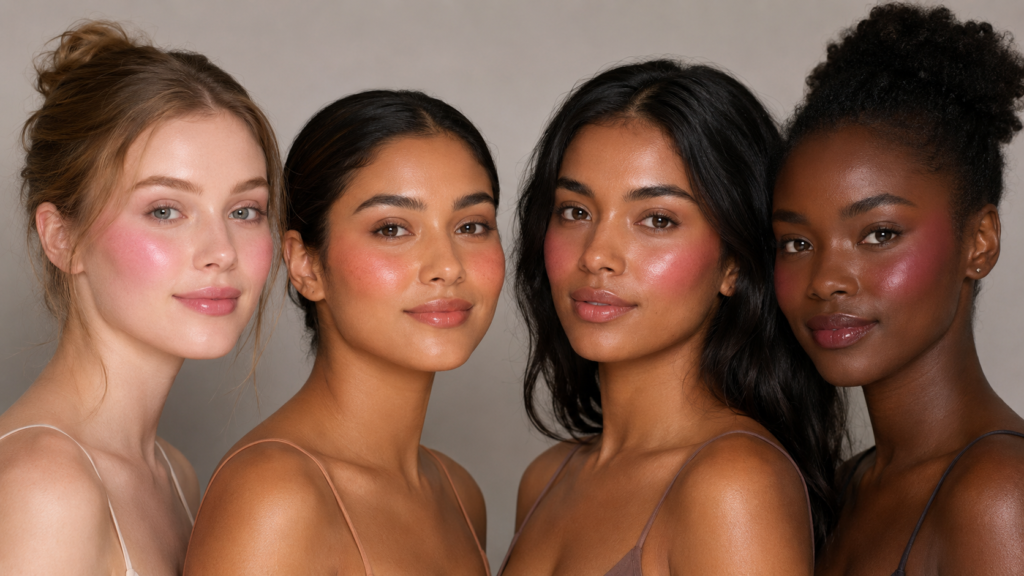
Judge the shade by how it sheers out, not by how intense it looks in the packaging.
Fair skin usually needs only a small amount of soft pink, rose, peach, or light coral. Very bright reds can still work, but apply them with a fingertip rather than directly from the stick.
Medium skin tones often suit watermelon, warm rose, coral, berry, and muted terracotta shades. These colors remain visible after blending without looking disconnected from the skin.
Tan and deep skin tones benefit from richer pigment. Look for deep berry, plum, vivid coral, burgundy, or red shades that remain clear instead of turning pale or ashy.
Undertone also matters. Cool pink and berry shades tend to look natural on cooler undertones, while coral, peach, and warm red flatter golden or olive skin. Neutral undertones can usually move between both groups.
Good to Know: A shade can look sheer and still leave a strong stain. Test one small layer and let it dry before adding more.
Where You Place Jelly Blush Changes the Effect
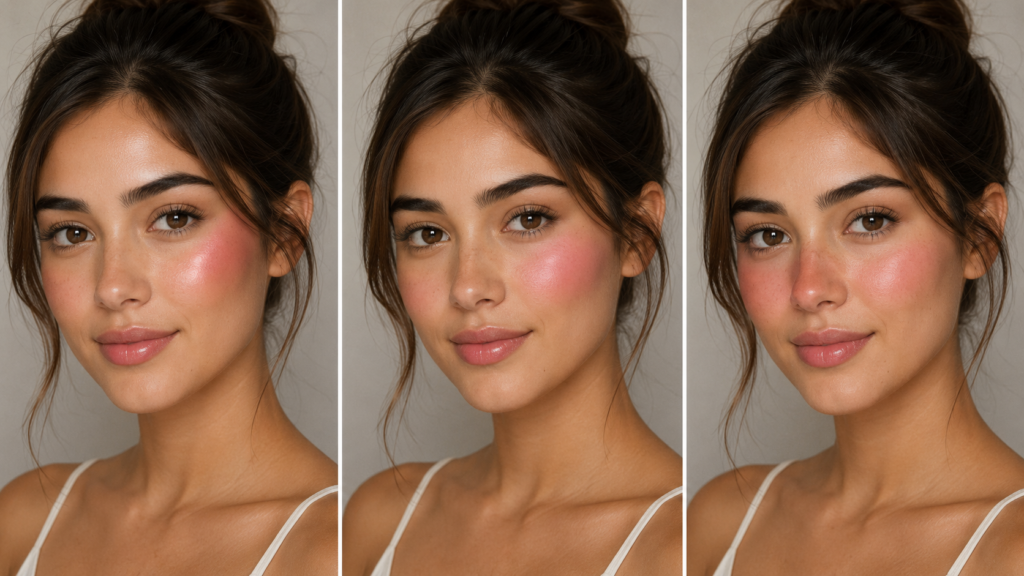
For a lifted look, place the color on the upper outer cheek and blend it toward the temple. Keep most of the pigment away from the center of the face.
For a soft, youthful flush, tap the blush over the rounded part of the cheeks and diffuse it upward. Stop before the color reaches the sides of the nose if you already have redness there.
For a sun-touched effect, use whatever is left on your finger across the bridge of the nose. Don’t apply a fresh swipe to the nose. Jelly blush stains quickly, and too much central color can look irritated rather than naturally flushed.
Round faces often benefit from higher, more outward placement. Longer faces can carry color slightly lower and more horizontally across the cheek. The formula stays the same, but thoughtful placement makes it look far more flattering.
Is Jelly Blush Good for Dry or Mature Skin?
It can be, but the thin texture doesn’t automatically make it moisturizing.
On dry skin, apply a lightweight moisturizer first and skip powder on the cheeks. If foundation is already separating around dry patches, fix the base before adding blush. The stain will follow whatever texture is underneath it.
Mature skin may benefit from jelly blush because it doesn’t create the thick, dry layer that some powder formulas do. Use a small amount and place the strongest color slightly above the fullest part of the cheek.
Avoid dragging the stick over the skin or placing a concentrated dot directly into deeper expression lines. Pressing the product on with a finger gives you more control and causes less movement underneath.
Does Jelly Blush Work on Oily or Acne-Prone Skin?
Jelly blush is often a good match for oily skin because it leaves less waxy or creamy residue than a balm blush. Once it dries, the color may remain even after natural shine begins to appear.
Start with a thin base and let the tint set completely. Add powder only where you become oily, such as beside the nose or under the cheekbone.
For acne-prone skin, a sheer jelly finish won’t add much physical thickness over raised texture. Still, you should check the formula for ingredients you already know cause problems for you.
Choose a fragrance-free option when your skin is reactive. Strong fragrance, certain dyes, and botanical extracts can irritate some skin types even when the product feels cooling and lightweight.
Why Jelly Blush Sometimes Turns Patchy
Patchiness usually comes from the surface beneath the blush rather than the jelly texture alone.
The most common causes are dry patches, heavy powder, too much product, slow blending, and foundation that hasn’t fully settled. Mixing incompatible layers can also contribute. A slippery base and a quick-setting stain don’t always grip each other evenly.
Another mistake is trying to fix a dried edge by rubbing harder. Once the pigment has stained, forceful blending often removes the foundation around it without moving the blush itself.
Instead, tap a tiny amount of moisturizer or skin tint around the edge with a clean sponge. This softens the border without disturbing the center.
I learned to stop chasing perfect symmetry while the product was still wet. One cheek may need an extra tap, but adding more to both sides usually creates a much stronger result than intended.
Does Jelly Blush Last Longer Than Cream Blush?
It often does because the pigment stains the skin rather than remaining inside a movable creamy layer.
A traditional cream blush may fade when oil, heat, or touching breaks down its emollient base. Jelly blush can lose its fresh finish while the underlying color remains visible.
Wear time still depends on the formula, your skin type, and the products underneath it. A jelly blush applied over thick moisturizer may fade unevenly, while a cream blush set lightly with powder may last all day.
For extra staying power, apply one thin jelly layer and let it dry. Tap a small amount of matching powder blush over the center, not across the whole cheek. This adds grip without hiding the translucent edges.
Can You Wear Jelly Blush Over Foundation?
Yes, but the foundation should be thin, settled, and mostly free of powder.
Transfer the jelly blush to your finger or brush rather than swiping the stick directly over foundation. Use a pressing motion and avoid going over the same area repeatedly.
On no-makeup days, jelly blush can look even better over sunscreen or a sheer skin tint because there’s less product underneath for the stain to disturb.
Can You Use Jelly Blush on Your Lips?
Only when the packaging specifically says the formula is approved for both lips and cheeks.
A lip-and-cheek jelly tint can create a matching wash of color, but lips are often drier than cheeks. Apply a thin layer, let it stain, then add a clear balm if the finish feels tight.
Don’t assume every cheek product is safe for the lips. Products intended for different areas can use different colorants and ingredient levels.
Who Probably Won’t Enjoy the Jelly Blush Trend?
You may not enjoy jelly blush if you prefer slow blending, strong sculpted color, or a fully powdered makeup base.
It can also frustrate anyone with active flaking, irritated cheeks, or an uneven foundation layer. The thin stain doesn’t hide those problems; it can make the contrast more visible.
People who love creamy, forgiving textures may still prefer a cream stick. Jelly blush asks for speed and restraint. That’s part of its appeal, but it’s also its main limitation.
Patch test a new formula when your skin is sensitive or you have a history of reacting to fragrance and dyes. Stop using it if you develop persistent burning, itching, swelling, or redness.
Is The Jelly Blush Trend Worth Trying?
The Jelly Blush Trend and Why Your Cheeks Need It makes sense when you want believable color without another heavy makeup layer.
Jelly blush gives you a sheer stain, a fresh skin-like finish, and better staying power than many rich cream formulas. It also demands quick blending, a smooth base, and a much smaller amount than the packaging may tempt you to use.
Start with one tap, work on one cheek at a time, and let the first layer dry before adding more. That simple method makes the difference between a natural flush and the bright stripes I created on my first attempt.
Save this guide before trying jelly blush so you can get the fresh finish without learning the patchy way.