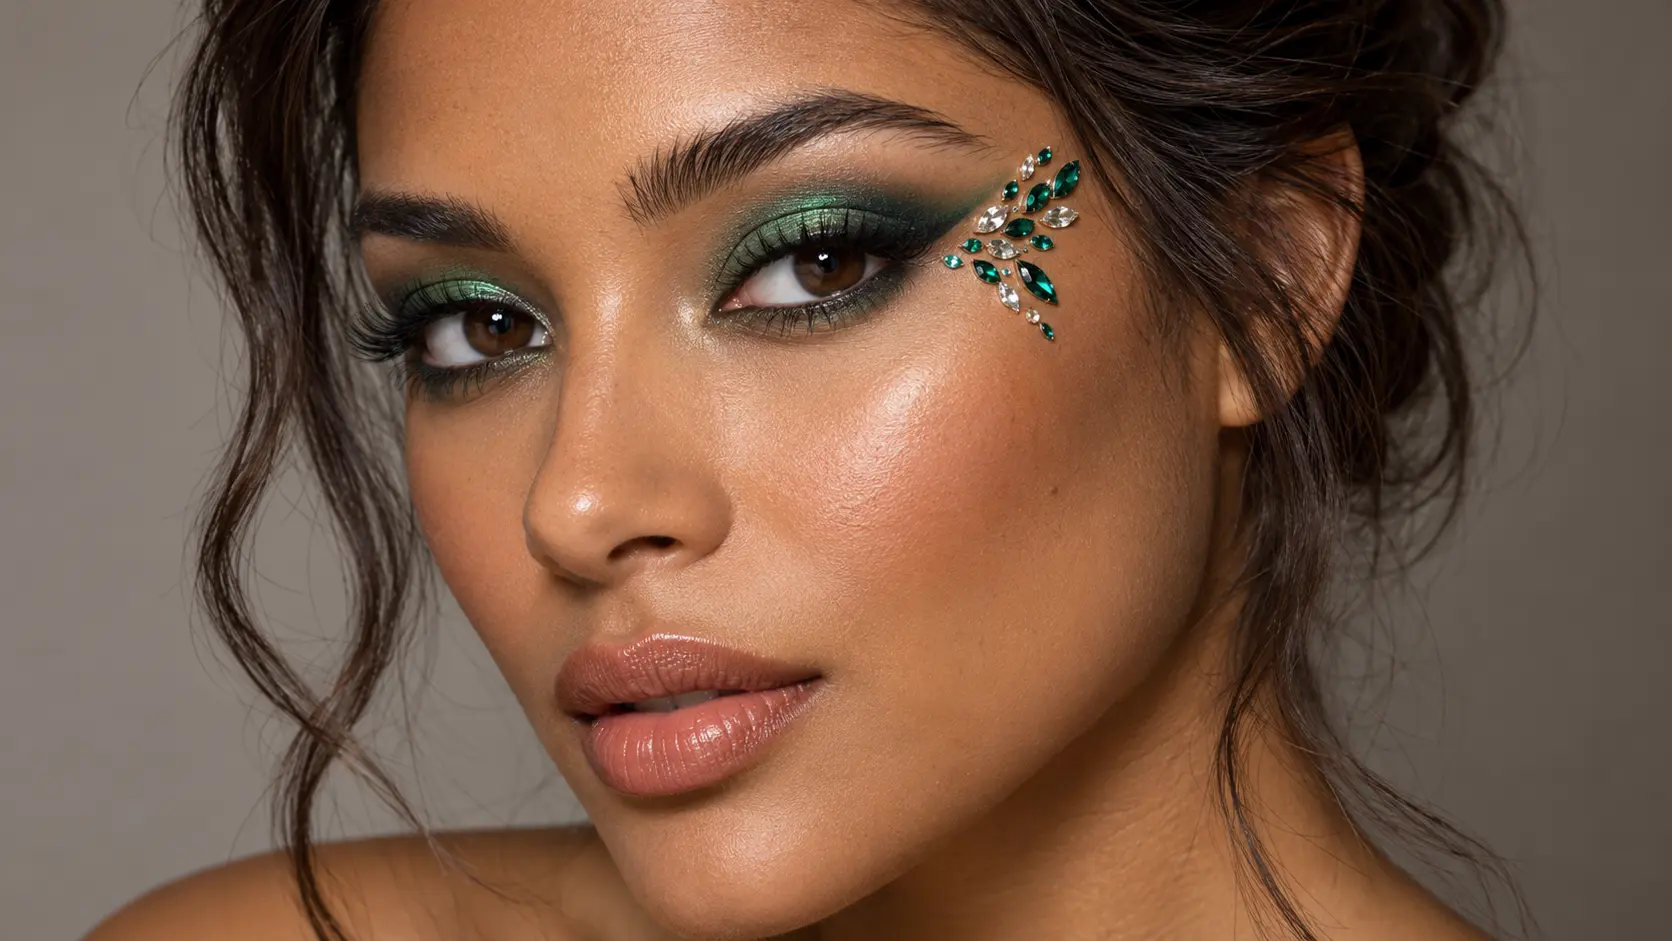
Sometimes, your makeup is almost finished, but it still needs one playful detail. A few crystals can give a familiar wing or soft pink eyeshadow a completely different mood.
That’s the appeal of eye gems makeup. You can keep it delicate with a small cluster near the outer eye or create something more expressive with scattered crystals and star details. The shape, spacing, and surrounding makeup make each version feel distinct.
These eight looks move from softly scattered sparkle to a bolder celestial finish. Choose the one that fits your plans, then adjust the amount of shine to your own style.
Before You Try Eye Gems Makeup
Treat the images as design inspiration rather than exact placement instructions. Keep gems on external skin away from the waterline, tear ducts, lash roots, and eyelid edges. Use decorations and adhesive specifically intended for the proposed cosmetic placement; a generic “face gem” label doesn’t establish suitability around the eyes. The FDA advises using products near the eyes only when intended for that use.
1. Add a Soft Crystal Scatter
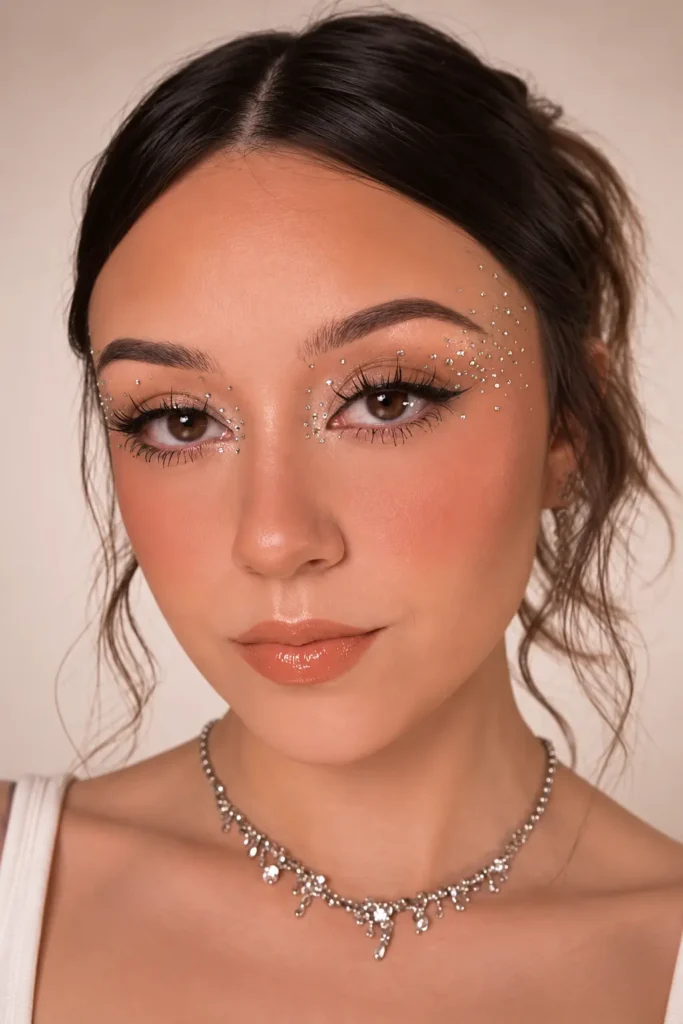
Tiny silver crystals scattered around the eyes give this first look an airy, almost freckled effect. Warm neutral shadow, defined lashes, and glossy nude lips keep the overall finish soft.
The placement is what makes it interesting. The crystals don’t form a rigid outline. Instead, they spread outward toward the temples, with small gaps that let the skin show through.
Choose this style for an evening celebration, a dressy dinner, or an occasion when you want noticeable sparkle without a bold eyeshadow color. It also works beautifully with silver jewelry and an updo that leaves the temples visible.
Start with a small outer cluster, step back from the mirror, and decide whether you need more. Building slowly helps preserve that light, scattered feeling.
Make it yours: Keep most crystals near the temples for a simpler version, or extend the pattern toward the outer brow for more drama.
2. Try Pink Shadow With Gem Trios
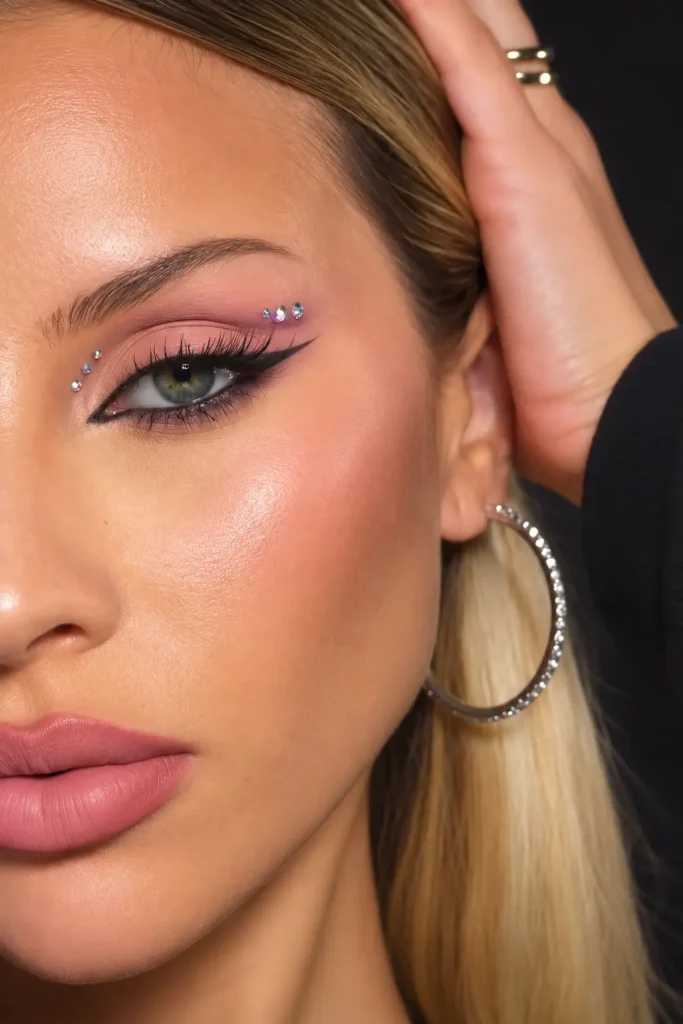
Soft rose eyeshadow, a sharp black wing, and a few iridescent stones create a pretty balance between romantic and graphic.
Compared with the first look, this design feels more deliberate. Small groups of gems act as accents, allowing the pink shadow and eyeliner to remain visible.
This is a useful starting point if you like polished party makeup but don’t want to spend the evening arranging dozens of crystals. A muted pink lip and rosy blush tie the colors together without competing with the eyes.
Finish the eyeliner before positioning your gems. Keep the clusters on suitable external skin, with clear space from the eye opening, rather than copying close inner-corner placement.
Make it yours: Choose pale pink stones for a coordinated finish or clear crystals if you want to wear the look with different outfits.
3. Frame Your Wing With Crystals

A defined black wing becomes the center of attention when clear crystals echo its upward angle. Soft brown shadow adds depth, while the stones create a decorative extension beyond the outer eye.
This version has a more structured feel than scattered sparkle. It suits anyone who already enjoys winged eyeliner and wants to make that familiar shape feel more dressed up.
Pair it with a satin brown or nude lip, softly sculpted cheeks, and earrings that pick up the crystals’ silver tone. It can complement a black evening outfit or embellished occasionwear without needing another bright color.
Map the direction while looking straight ahead. Keep the crystals beyond the outer wing, on external skin, and leave enough space for each stone to remain visually separate.
Make it yours: Use a short crystal trail for a restrained finish, or add a small cluster above its outer end.
4. Layer Silver Shimmer With Gems
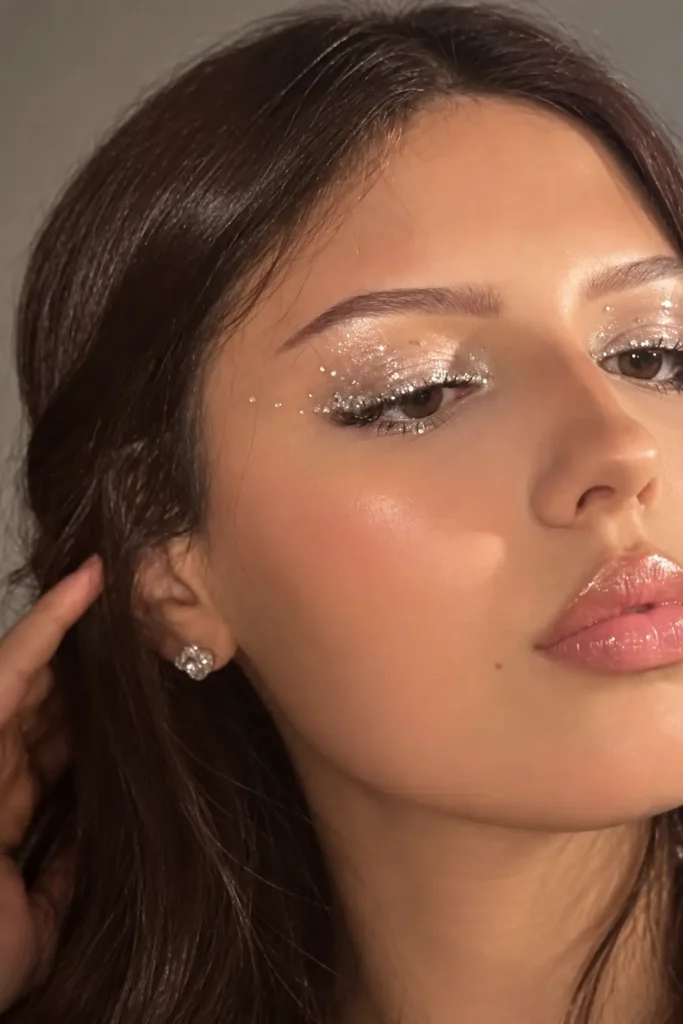
The fourth look pairs a reflective silver lid with scattered crystal details for a luminous evening finish. The sparkle covers more visual space, so the rest of the makeup stays relatively simple.
To interpret the look, begin with a smooth silver or champagne shimmer eyeshadow intended for eye use. Let that reflective base provide most of the shine, then add a few crystals farther outward toward the temples.
This is a lovely option for a birthday, holiday party, or evening event with a metallic dress. Champagne tones can make the effect warmer, while silver creates a cooler mood.
Avoid trying to recreate the photograph with loose glitter. Glitter particles can enter the eye and cause injury; a TFOS report identifies their edges as a concern for corneal abrasions.
Make it yours: Choose one main shimmer shade and a small crystal arrangement so the finish feels intentional rather than crowded.
5. Keep It Sweet With Lilac Accents
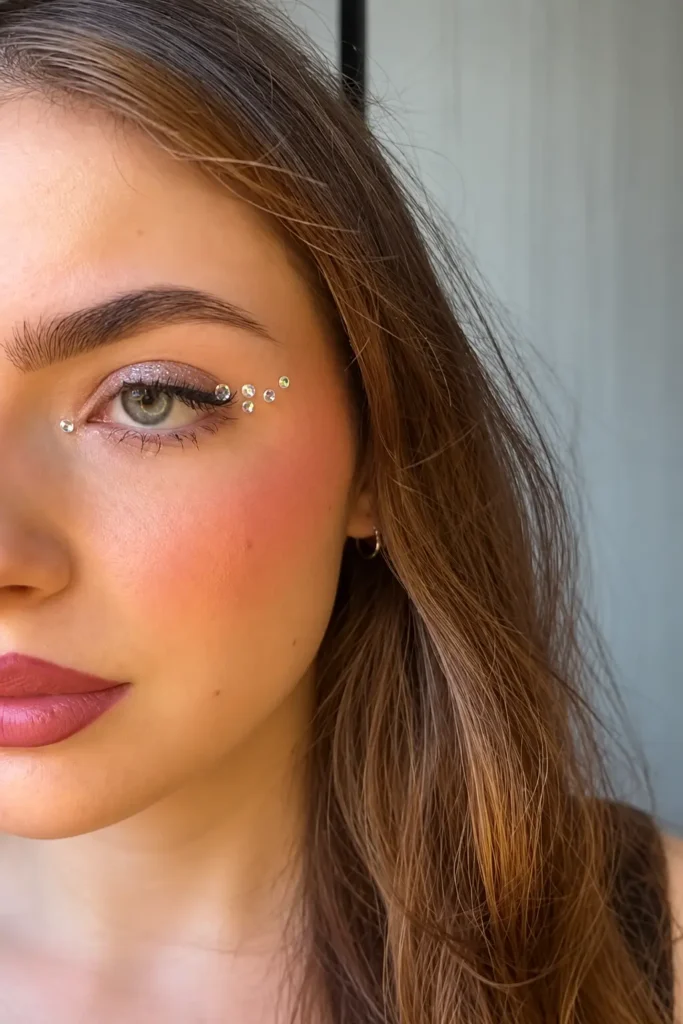
A soft lilac-pink lid and a small outer cluster make this look feel fresh and approachable. The larger iridescent gems create little flashes of color without covering the entire eye area.
It suits someone who likes a pastel makeup palette and wants to try rhinestone eye makeup in a manageable way. A sheer berry lip, peachy blush, and softly defined lashes complete the mood.
Keep the shadow blended and relatively simple. The crystals already add detail, so a complicated cut crease or several competing colors aren’t necessary.
Recreate the cluster farther toward the temple, leaving the lash line and inner corner free of stones. Use fewer gems than you think you need, then check the arrangement from a normal viewing distance.
Make it yours: Swap lilac for pale peach or rose gold while keeping the same small-cluster layout.
6. Go Bold With a Crystal Constellation
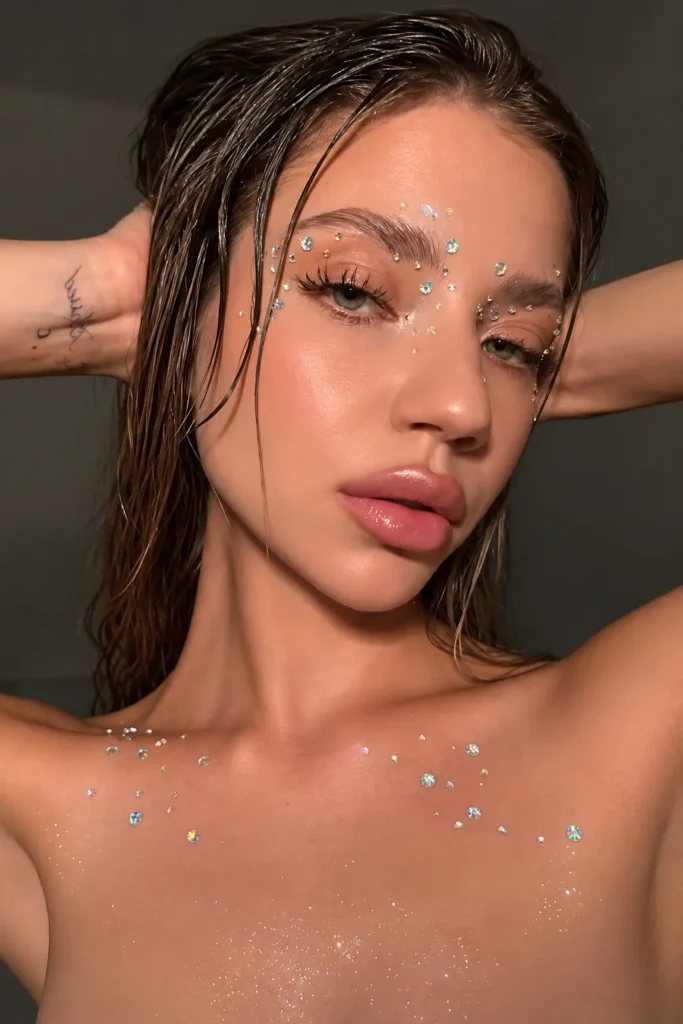
Mixed-size gems scattered above the brows and toward the temples give this look its expressive, celestial character. The reference carries the sparkle onto the collarbones, making the decoration feel like part of the whole outfit.
This is the most statement-making eye gems makeup idea in the selection. It suits a themed party, concert outfit, or creative photo session where you want the styling to feel playful.
Keep the eyeshadow understated so the crystals remain the main feature. Glossy lips and brushed brows work well with the less structured arrangement.
Plan the larger stones first and use smaller ones to connect the design visually. The two sides don’t need to match exactly, but repeating a few sizes or colors helps them feel related.
Make it yours: Limit the constellation to the outer brows and temples if you want a quicker, less elaborate version.
7. Create a Floating Crystal Line
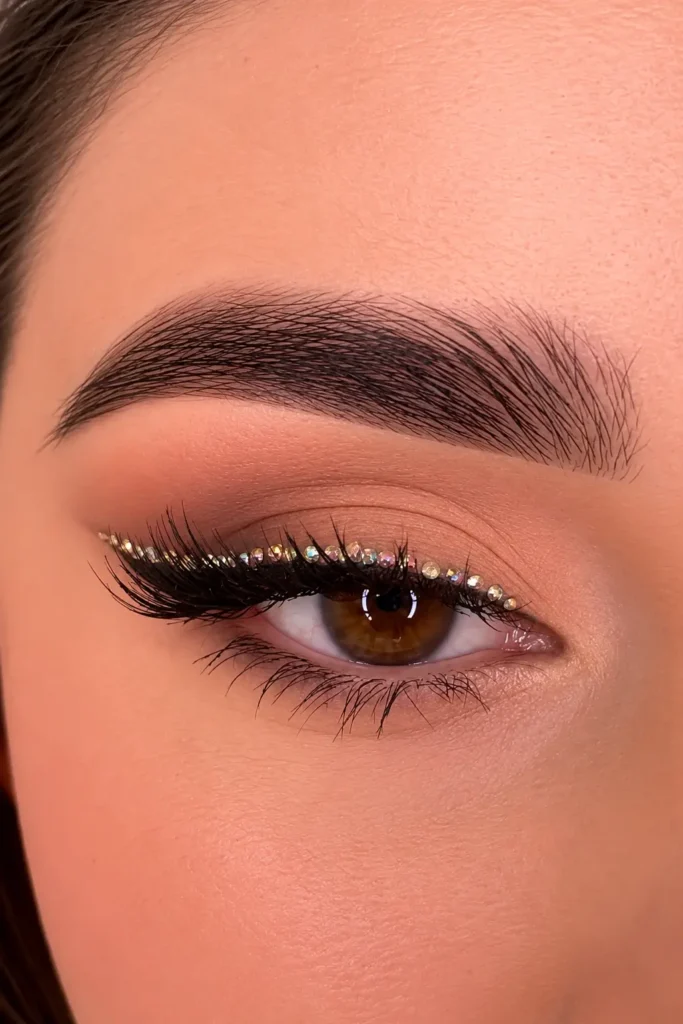
A neat row of tiny crystals gives this reference its jeweled eyeliner effect. Warm matte shadow and defined lashes keep the overall palette simple.
For a more practical interpretation, move the crystal row above the crease or out toward the temple rather than placing stones directly along the lash roots. You still get the clean, graphic feeling, with more separation from the eye opening.
This style suits someone who prefers an organized design to scattered gems. It’s especially effective when the rest of the makeup has soft edges, allowing the crystal line to provide contrast.
Check the shape with your eyes open before applying adhesive. A design that looks straight on a closed lid can read differently when you look ahead.
Make it yours: Try a short floating arc instead of a full row. Consistent spacing matters more than using lots of stones.
8. Add Stars to a Pink Wing
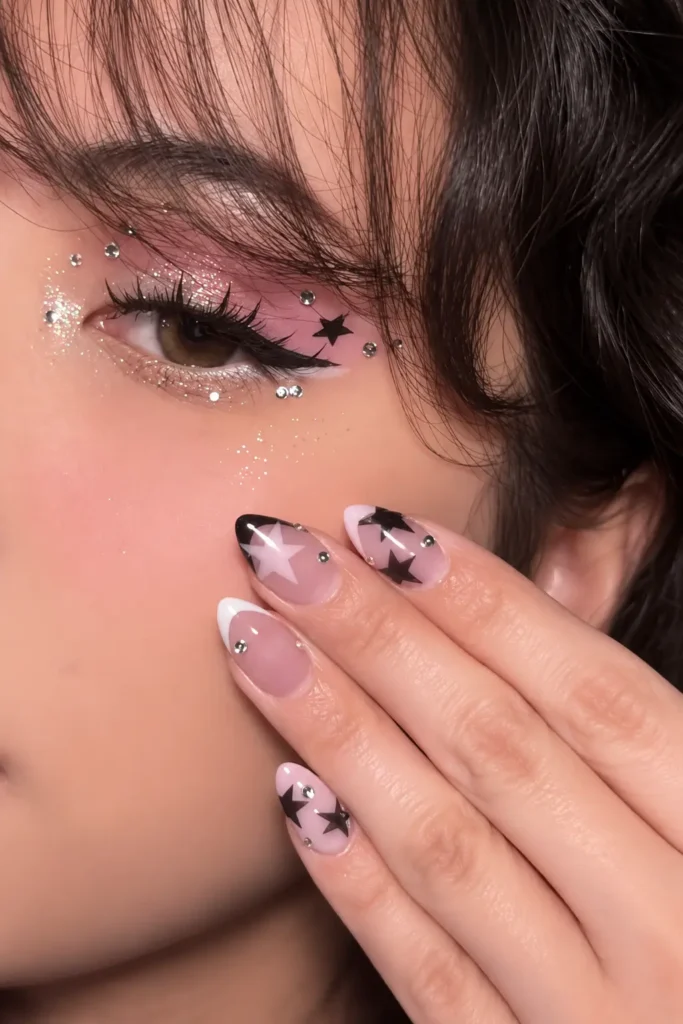
Pink shimmer, a strong black wing, silver crystals, and a black star create a playful finish with a little edge. The matching star manicure in the reference makes the styling feel coordinated.
This look suits anyone drawn to celestial makeup and stronger graphic details. Pink softens the black elements, while the crystals bring brightness to the outer design.
Keep the star on the temple beyond the eyeliner wing. A few surrounding stones are enough to connect the shapes without hiding the pink shadow.
For the star, use an eye-area product where appropriate or a cosmetic decoration explicitly suitable for the intended external-skin placement. Nail decorations and nail adhesive belong in a different product category.
Make it yours: Repeat one star motif in your accessories or manicure, and keep the remaining colors simple.
Make Your Eye Gems Makeup Easier to Apply
Choose the pattern before opening the adhesive. For a first attempt, one small outer cluster is easier to manage than a detailed arrangement around both eyes.
Finish your eyeshadow, eyeliner, and mascara first. Let the makeup dry, then follow the gem and adhesive instructions for preparation, application, and setting time. Wash your hands and use clean tools; avoid sharing eye cosmetics.
Give yourself time for a practice run before an important event. Photograph the finished look with your eyes open and relaxed so you can judge the spacing.
Test unfamiliar cosmetics in advance according to their instructions. The American Academy of Dermatology recommends testing new skin care products on a small area over seven to ten days. A skin test doesn’t establish that a product is suitable for eye-area use. aad.org
For removal, follow the adhesive’s directions and avoid pulling firmly attached gems from the skin. Remove the decorations before cleansing away the remaining makeup, using gentle movements rather than scrubbing.