Traditional zombie makeup usually follows the same formula: pale skin, dark eyes, fake blood, and torn clothing. That approach can still work, but it isn’t your only option. Your zombie can be colorful, glamorous, comic-inspired, subtly unsettling, or completely over-the-top.
The best look is one that fits your makeup skills, available time, costume, and comfort level. These 12 zombie makeup ideas give you a strong starting point while leaving plenty of room to change the colors, details, and intensity.
Prep Your Skin First
Detailed Halloween makeup usually sits better on clean, moisturized skin. Apply a lightweight moisturizer and allow it to absorb before starting. If you’ll be wearing the look for several hours, add a primer that works with your skin type and face-paint formula.
Patch-test unfamiliar face paint, adhesive, or liquid latex in advance. Use products labeled for cosmetic use, and check whether bright pigments are approved for the area where you plan to apply them. Don’t place makeup over irritated, broken, or inflamed skin.
Keep micellar water, cotton swabs, clean brushes, and a small mixing palette nearby. Correcting a line immediately is much easier than trying to cover it after several layers have dried.
12 Zombie Makeup Looks
1. Create a Neon Pop Zombie
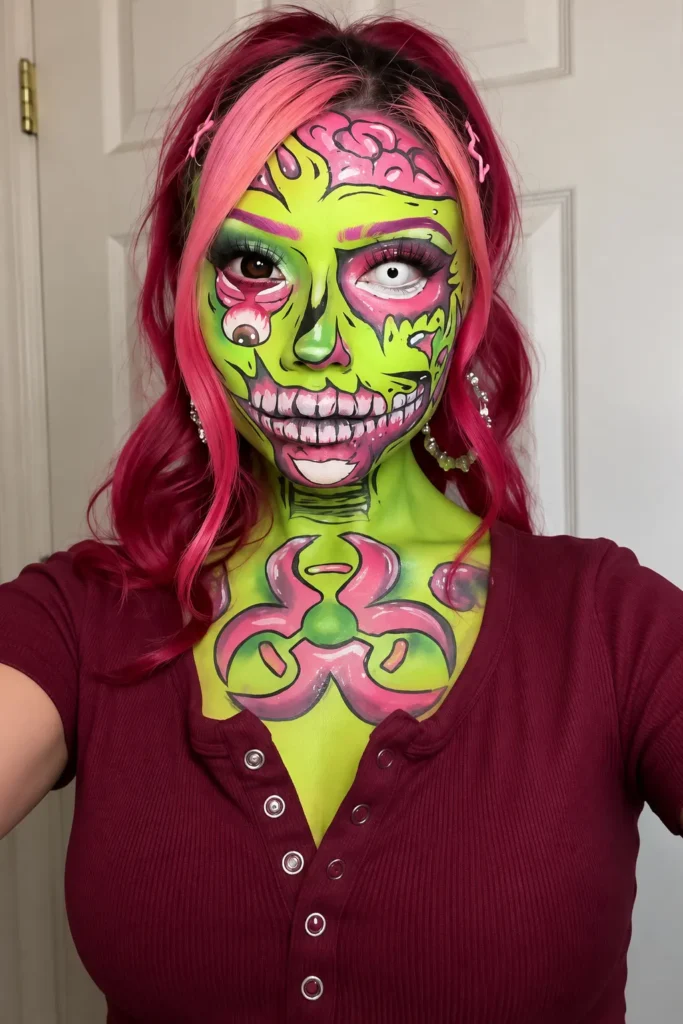
If gray zombie makeup feels too predictable, this neon version brings the undead theme to life with electric green, hot pink, and sharp black details. It has the energy of comic-book art while still looking creepy enough for Halloween.
Begin with a thin green base across the face and any visible areas of the neck. Add bright pink around the eyes, forehead, and mouth, then use black face paint to outline the skull shapes, teeth, and exposed-brain design. Varying the thickness of the black lines will make the artwork feel more dimensional.
This look suits confident beginners and anyone who wants makeup that stands out in photos. It takes time, but you don’t need advanced prosthetic skills.
Make It Yours: Coordinate the pink accents with your wig or costume. Purple, orange, red, and electric blue can create equally bold results.
2. Paint a Hot-Pink Skull
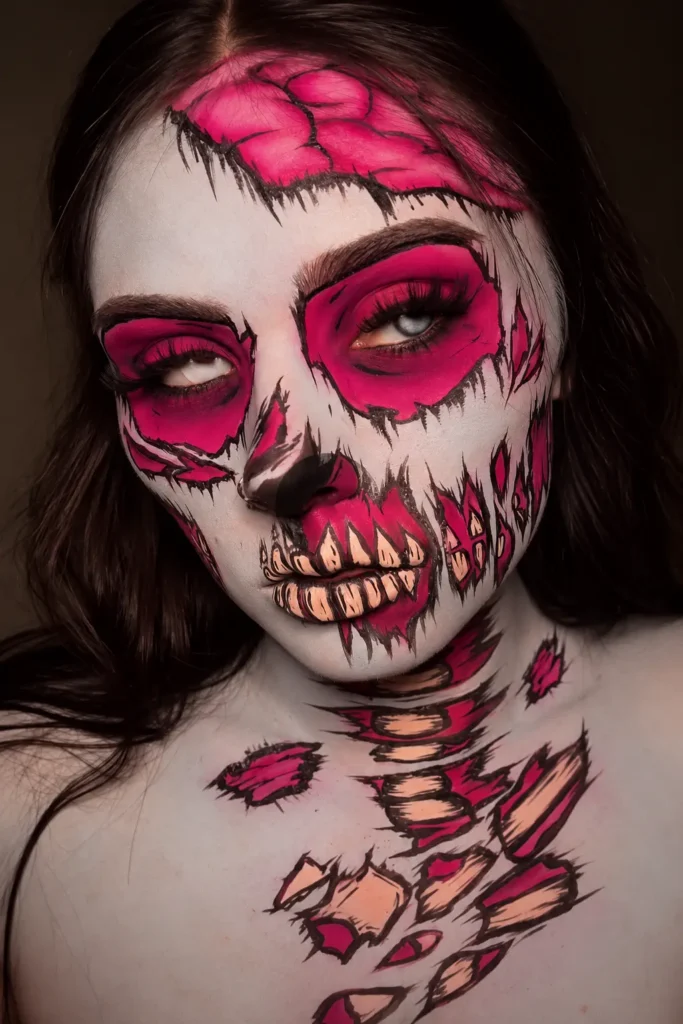
A pale base and hot-pink skull details create a look that feels dramatic without depending on realistic wounds. Dark, uneven outlines around the eyes and mouth give the design a distressed finish, while the bright color keeps it playful.
Sketch the main shapes lightly before adding paint. Create large pink eye sockets, a broken forehead section, and a skeletal mouth. Then add black lines around the edges to increase contrast. The shapes don’t have to match perfectly; slight differences between the two sides make the design feel more expressive.
This zombie makeup idea is especially effective for close-up photos because the strong lines remain visible even under dim lighting.
Application Tip: Set cream paint with a matching eyeshadow or cosmetic setting powder to help the colors stay defined.
3. Try Electric Blue Zombie Makeup
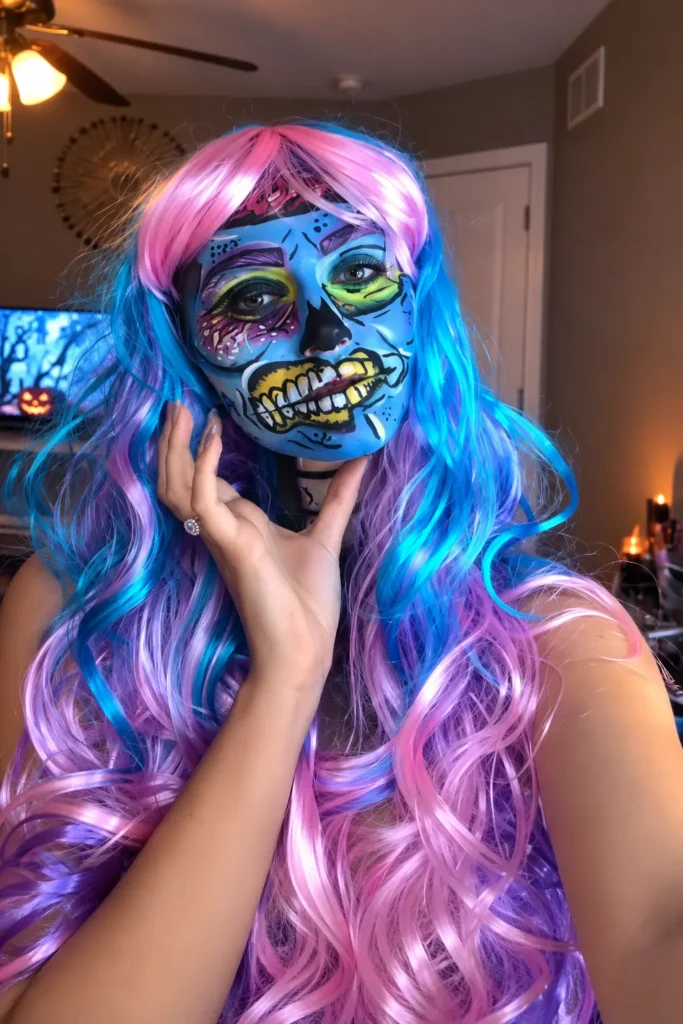
This electric blue zombie looks as though it stepped out of an animated fantasy world. The blue base, bright hair, colorful eye details, and yellow skeletal mouth turn a frightening theme into something creative and energetic.
Apply a medium-blue face paint in thin layers. Deepen the eye sockets and sides of the nose with navy or black, then use yellow or chartreuse around the mouth for contrast. A pink-and-blue wig completes the look, but temporary hair color or bright accessories can create a similar effect.
Choose this style if you love colorful makeup or want your Halloween look to feel more artistic than realistic. It also works well for parties where ordinary gray makeup may disappear under colored lighting.
Make It Easier: Keep the paint on your face and skip the neck if you need a faster application and cleanup.
4. Build a Shadowed Corpse Look
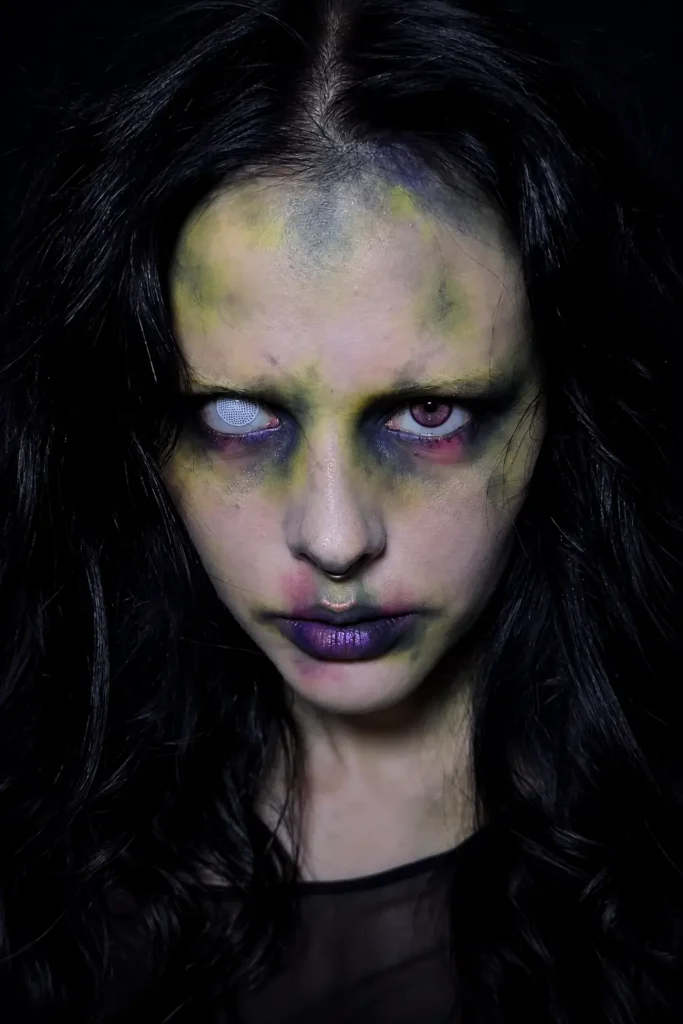
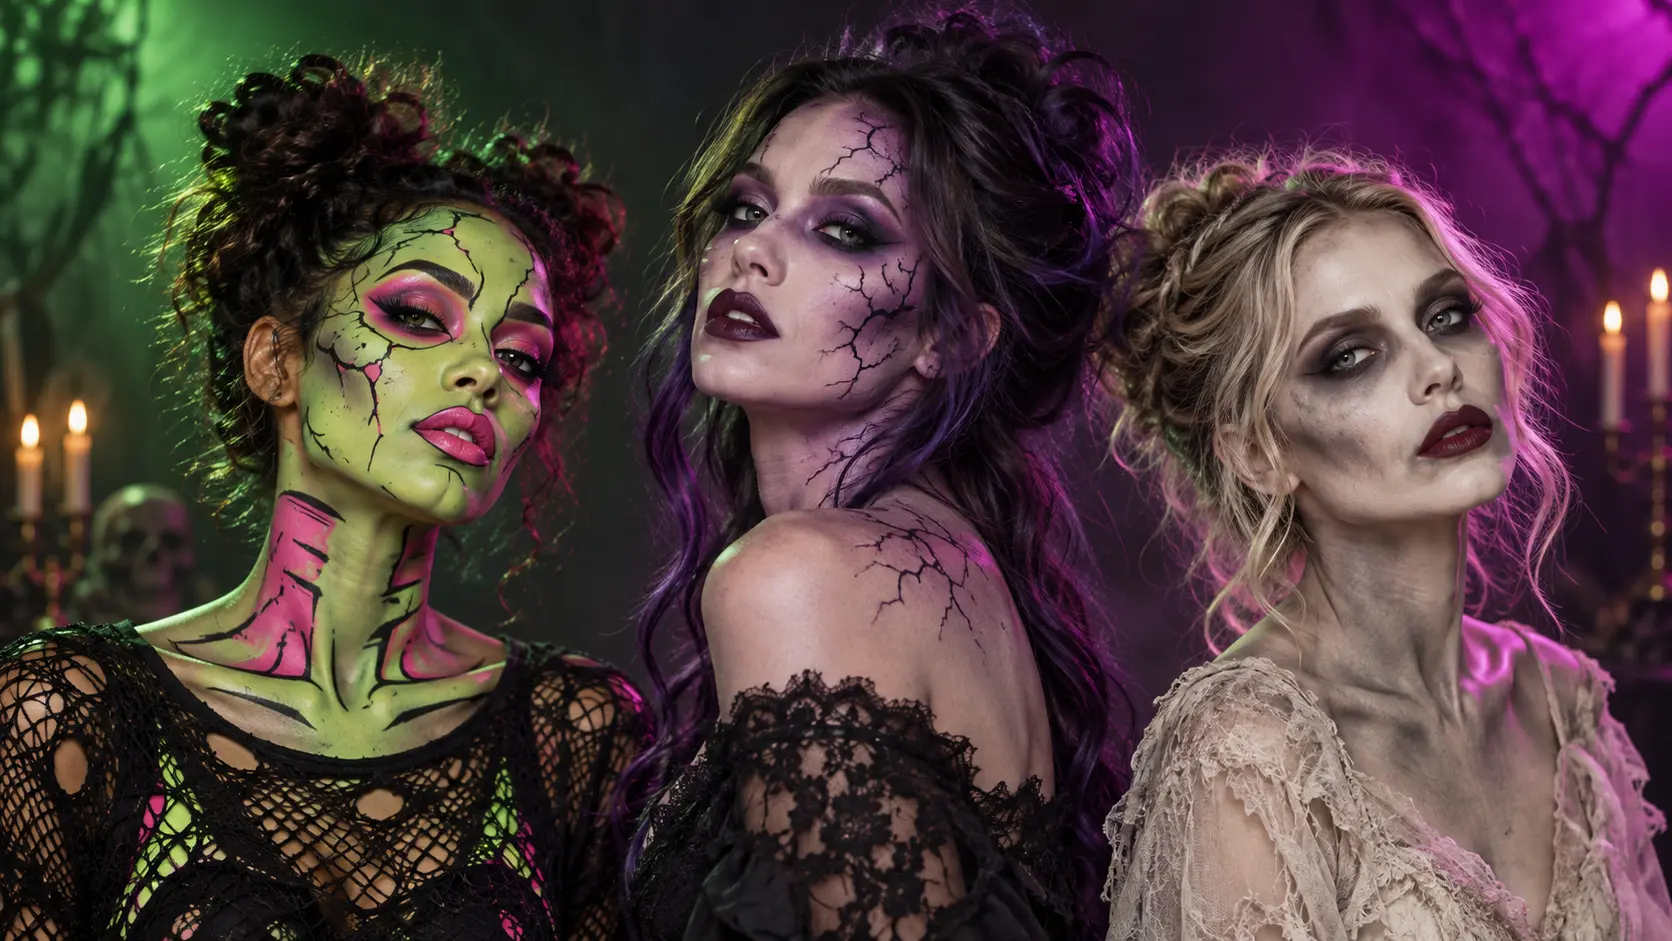
This look proves that imperfect blending can be an advantage. Uneven green-gray color, bruised purple shading, dark eye sockets, and messy black hair create a character that appears tired, eerie, and otherworldly.
Blend olive, charcoal, yellow-green, and muted purple across the face using a damp sponge. Concentrate the darkest shades around the eyes and temples, but allow parts of your natural complexion to remain visible. This creates a mottled finish instead of a flat layer of paint.
The shadowed corpse look is a practical choice for beginners because it doesn’t require precise linework. If one area appears uneven, you can soften it with a clean sponge or turn it into part of the design.
Watch Out: Keep powder and loose pigment away from the waterline and inner eye area.
5. Wear Tired Undead Glam
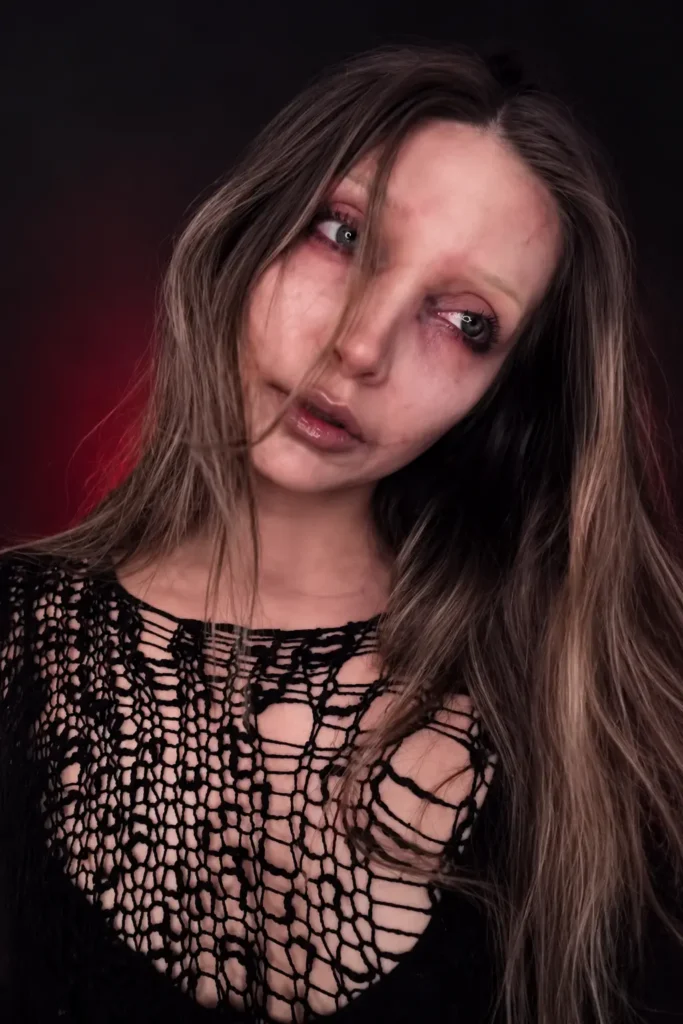
You don’t need full-face paint to look convincingly undead. Smudged eyes, washed-out skin, muted lips, and deliberately messy hair can create a haunting transformation while allowing your natural features to remain recognizable.
Start with your regular foundation or one slightly lighter than your usual match. Blend taupe, plum, and charcoal around the eyes, extending the shadow lower than you would for everyday makeup. Add subtle gray contour beneath the cheekbones, then finish with a muted nude or cool berry lip.
This is one of the easiest zombie makeup looks to create with products already in your collection. It’s also comfortable enough for a long party because it avoids thick layers of face paint.
Style It: Pair the makeup with a distressed black top, ripped knitwear, or a faded dress for an effortless costume.
6. Paint a Green Graphic Skull
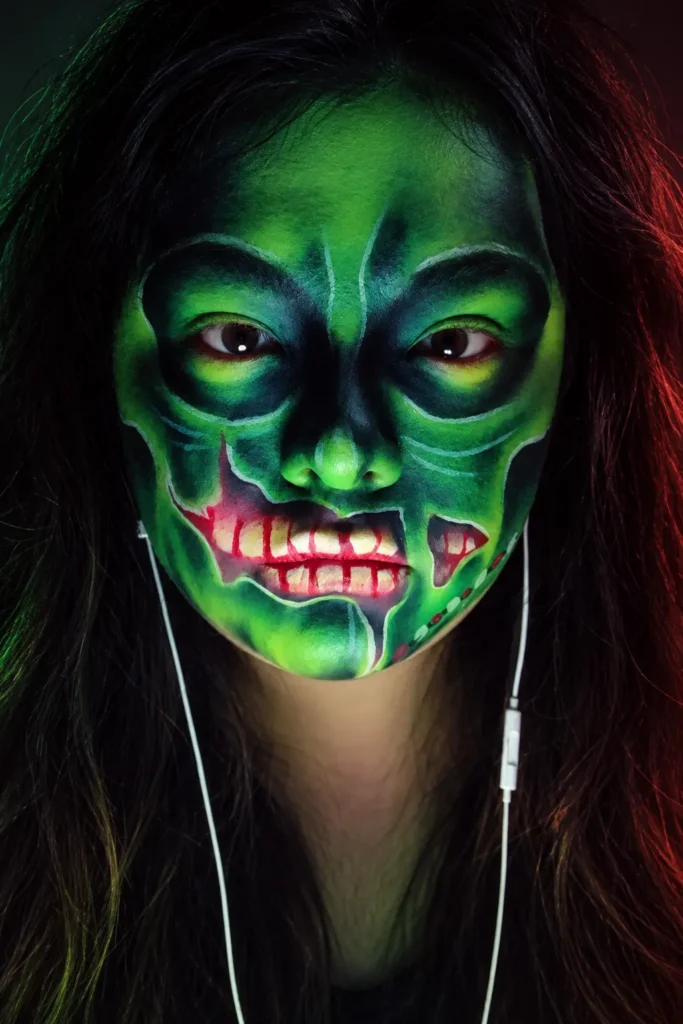
Bold green face paint and oversized black skull shapes give this look a striking graphic finish. The circular eye sockets, painted nose, and skeletal mouth remain easy to recognize from a distance, making it a strong choice for photos, videos, and crowded Halloween events.
Apply the green base first and let it set. Use a black pencil to map the eye sockets, nose, cheek lines, and mouth before filling them in with paint. Instead of drawing dozens of tiny teeth, paint a pale mouth shape and divide it with a few clear vertical lines.
This look suits beginners who enjoy bold makeup but don’t want to create detailed prosthetics. The design can be as clean or messy as you prefer.
Make It Yours: Add red, purple, or blue lighting when taking photos to give the green face paint more depth.
7. Create a Pretty Red-Eye Zombie
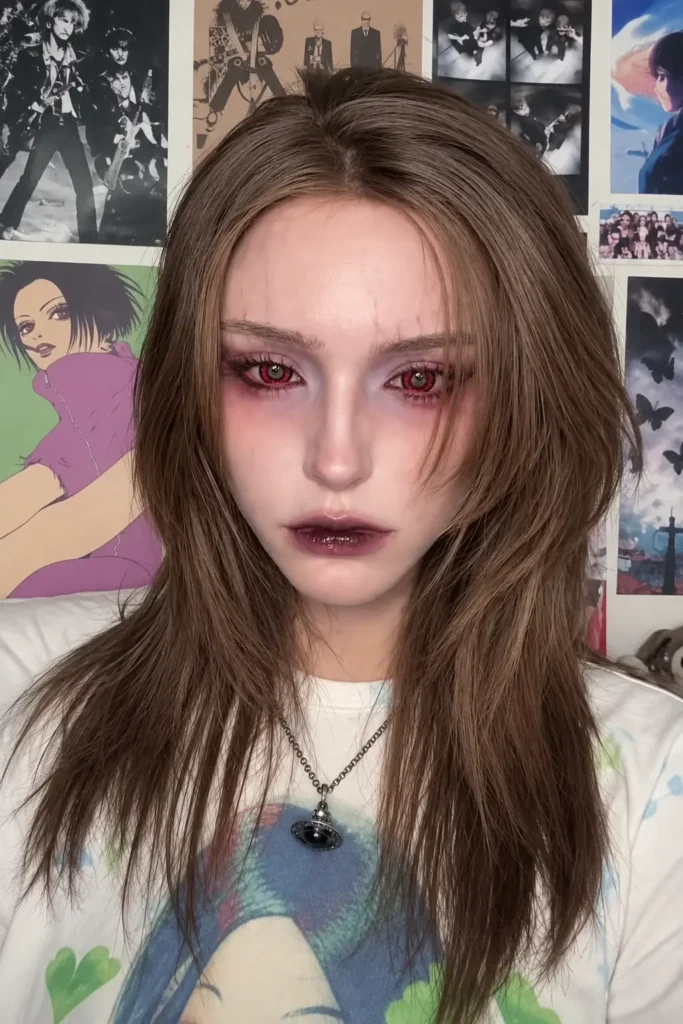
Soft lavender eyeshadow, red-toned eye makeup, blurred under-eye color, and glossy dark lips create a zombie that still feels polished. The effect is subtle enough for beauty lovers who want an eerie look without hiding their entire face.
Keep the complexion close to your natural skin tone. Blend mauve or plum shadow around the eyes, then add burgundy liner for extra intensity. A dark berry lip stain topped with clear gloss creates the appearance of a deeper, slightly unsettling lip color without painted wounds.
The look works particularly well with loose hair, a casual outfit, and one or two carefully chosen accessories. It’s simple, but the unusual eyes make it instantly recognizable.
Eye Safety: If you want decorative red lenses, obtain properly fitted prescription lenses through an eye-care professional. You can also skip lenses and build the effect using makeup alone.
8. Draw a Cracked Vein Zombie
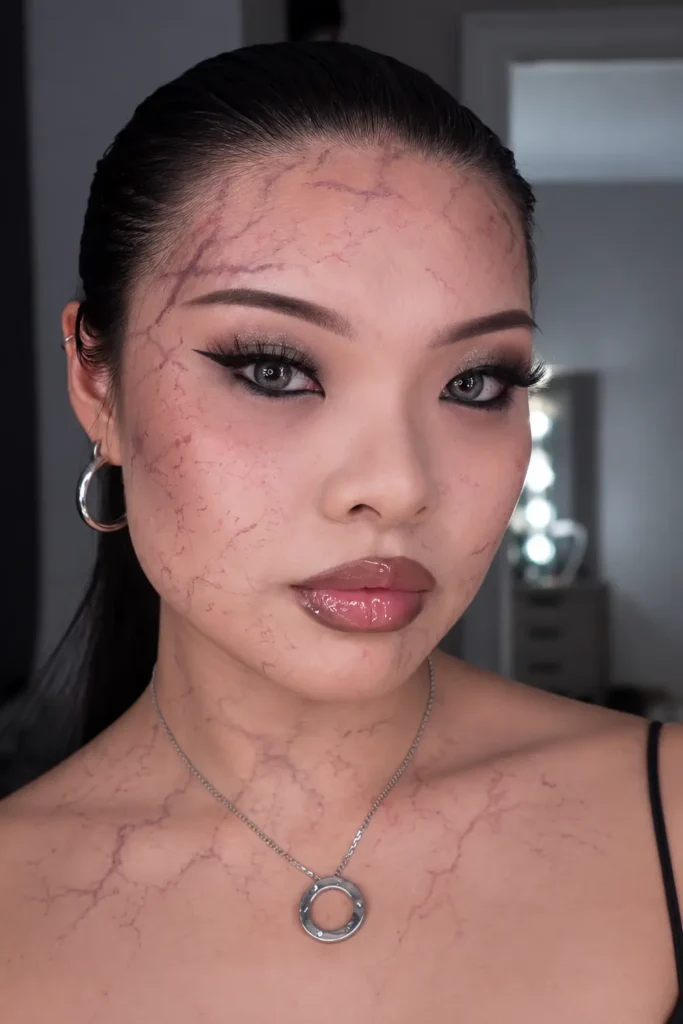
Fine purple and red lines spreading across the face and neck create the illusion of transformed skin. Combined with sharp eyeliner, glossy lips, and sleek hair, the result feels glamorous from a distance and increasingly creepy when viewed up close.
Blend soft mauve or gray shading around the temples and cheekbones first. Use a fine brush and diluted cosmetic paint to draw branching lines over the shaded areas. Some lines should be darker and more visible, while others should fade gently into the skin.
This zombie makeup look is ideal for a dressier Halloween costume because it adds character without covering your regular beauty makeup.
Good to Know: Concentrating the lines around one temple and down one side of the neck often looks more convincing than covering the face evenly.
9. Shape an Undead Face
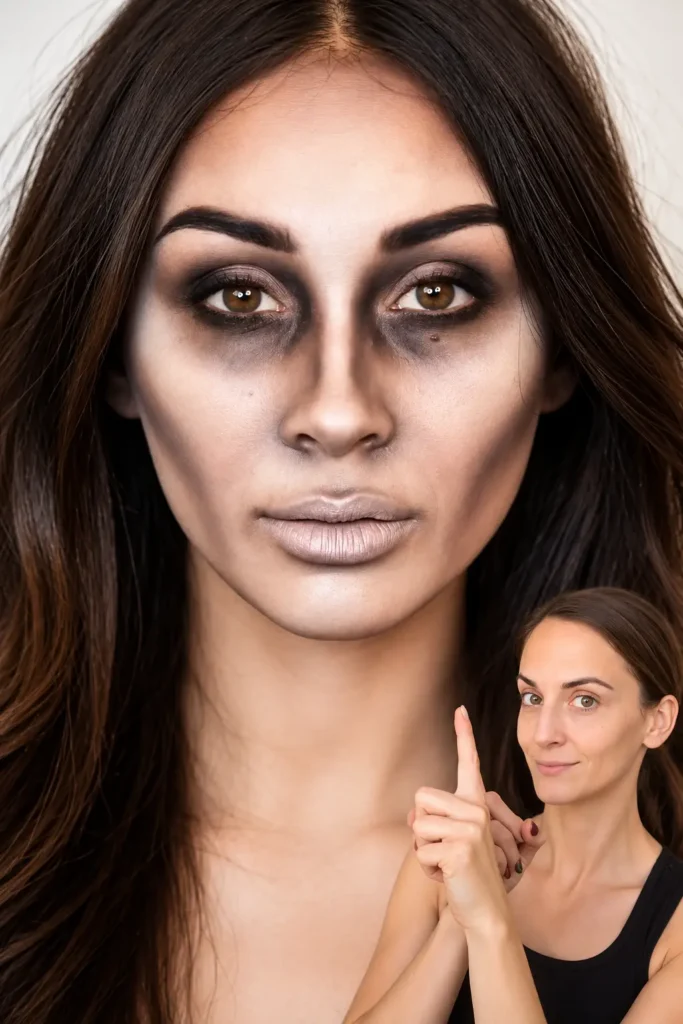
A few carefully placed shadows can completely change the structure of your face. Deep gray shading around the eyes, cheek hollows, temples, and sides of the nose creates a sunken effect without special-effects products.
Use matte taupe, cool brown, and charcoal shadows rather than pure black. Build the colors gradually, keeping the center of the forehead, nose, and chin lighter. Blend the cheek contour lower than you would for regular makeup to create a more tired, hollow appearance.
This affordable zombie makeup idea works well for beginners, minimalists, and anyone working with a small makeup kit. You can keep it clean and editorial or add smudges for a rougher finish.
Application Tip: Step away from the mirror occasionally. The contour may appear subtle up close but much stronger from a normal viewing distance.
10. Recreate a Classic Zombie
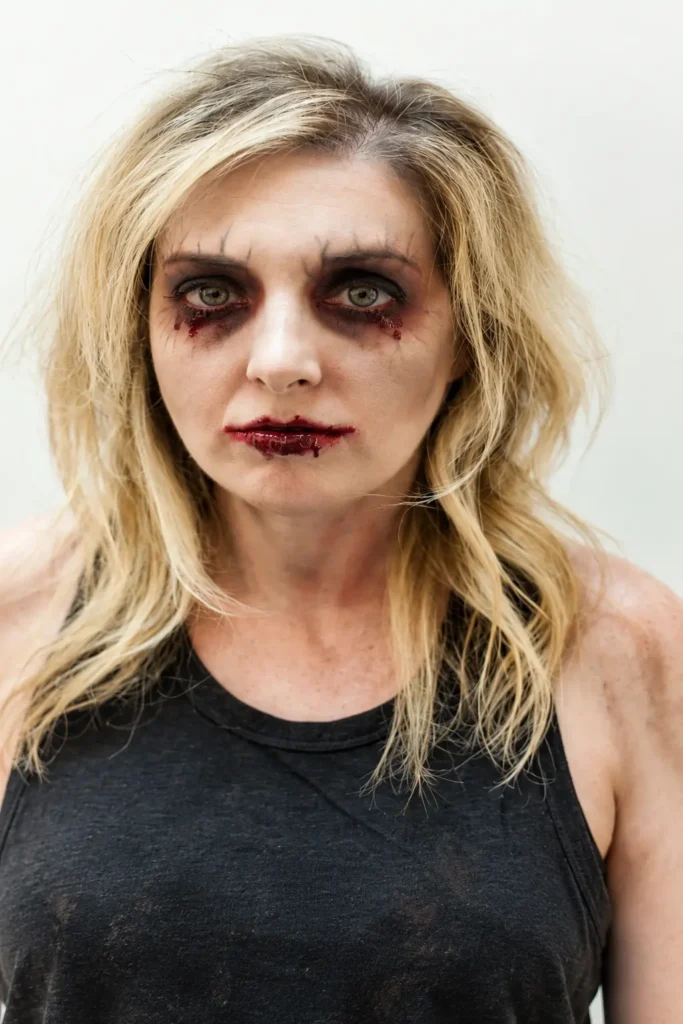
Messy blonde hair, smoky eyes, pale skin, and a stained dark-red lip create the familiar zombie style many people picture first. It’s recognizable, easy to adapt, and suitable for almost any type of distressed costume.
Blend brown, plum, and charcoal shadows around the eyes, extending the color toward the brows and lower cheeks. Lightly mute the complexion with pale foundation or a thin layer of face paint. Finish with burgundy lip color, allowing the edges to look slightly smudged.
This look is a useful choice when you want a clear Halloween transformation without spending hours on detailed painting. A torn tank, weathered dress, or old shirt can complete it.
Make It Softer: Replace graphic blood effects with berry lipstick and dark brown shadow for a less intense version.
11. Try Purple Cracked Zombie Makeup
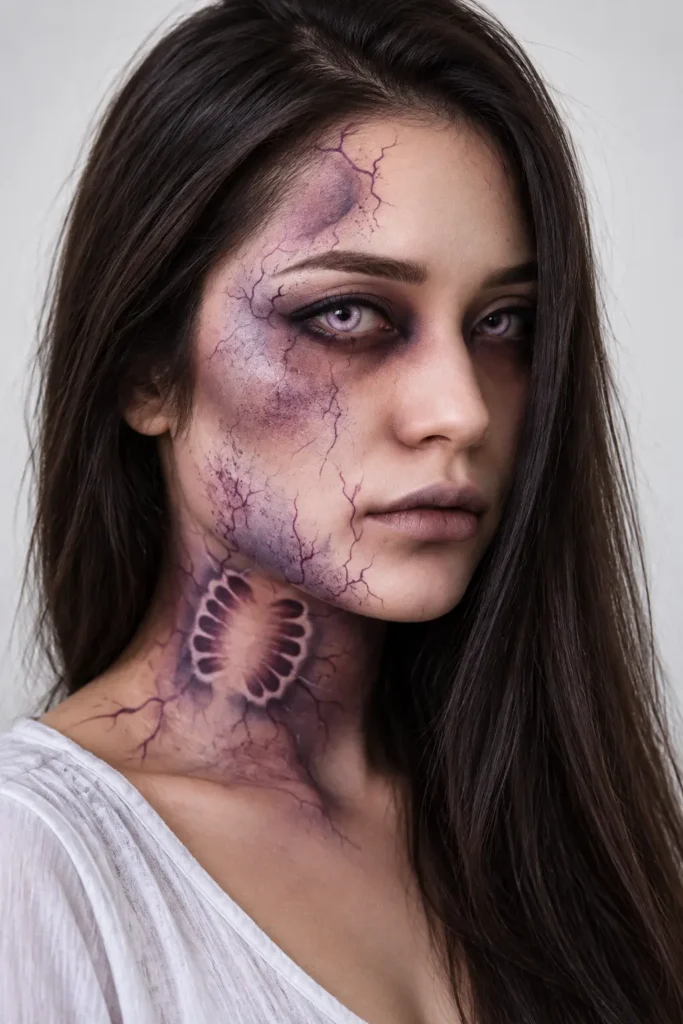
Purple bruised shading and delicate crack patterns create a fantasy-style zombie that feels detailed without becoming overly graphic. Placing most of the design on one side of the face gives it a modern, asymmetrical finish.
Begin with lilac and mauve around the eye, temple, and cheek. Add charcoal to the deepest areas, then draw fine branching cracks using a small brush. Continue a few lines down the jaw and neck so the design appears connected rather than limited to one patch.
This look suits intermediate makeup fans, but beginners can simplify it by creating fewer lines and concentrating on one area. Pale lavender eye makeup can pull the colors together.
Pro Tip: Rest your painting hand lightly against your cheek or chin to steady the brush while drawing thin lines.
12. Make a Kid-Friendly Zombie
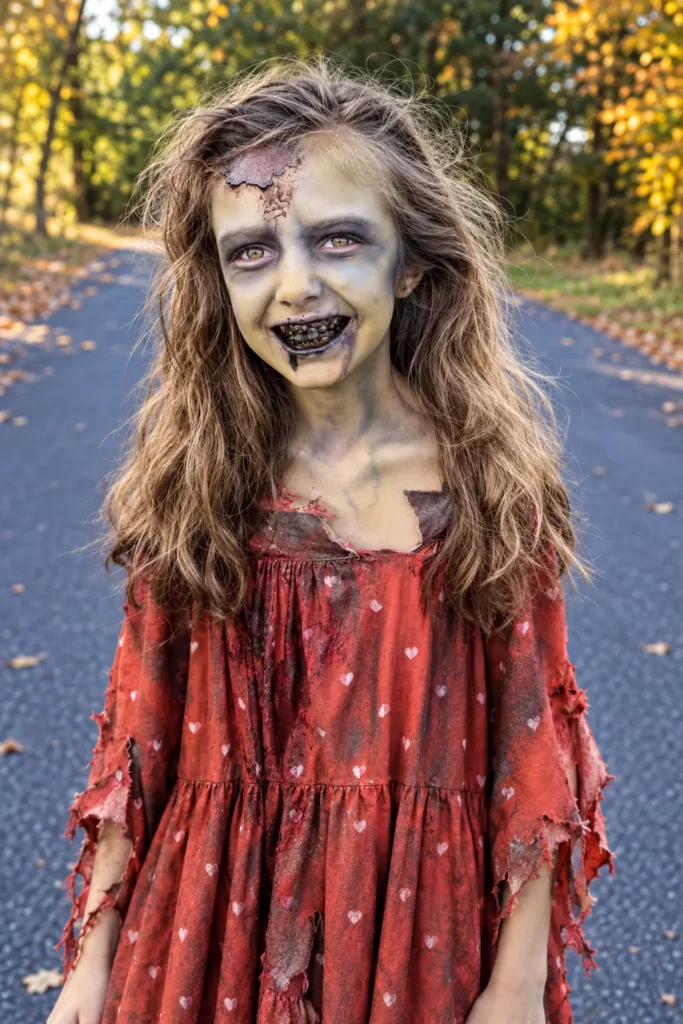
A kid-friendly zombie can look playful and spooky without realistic wounds or uncomfortable prosthetics. Messy hair, a weathered red outfit, softly darkened eyes, and pale green-gray face paint are enough to create the character.
Choose washable face paint labeled for children and avoid the immediate eye area. Keep the application simple with three main details: a light zombie-colored base, soft gray shadow around the eyes, and washable dark lip color. A distressed costume will do much of the visual work.
Skip strong adhesives, complicated prosthetics, and costume contact lenses. Children should be able to move, eat, and enjoy the event comfortably.
Comfort Tip: Let the child decide how much makeup they want. Stop immediately if they experience itching, burning, or eye discomfort.
Help It Stay Put
Zombie makeup lasts longer when it’s applied in thin, controlled layers. Let each cream or face-paint layer settle before adding the next. If the formula allows it, lightly set the finished design with translucent powder or a powder in a coordinating color.
A setting spray may help reduce transfer, but it cannot make every product completely sweatproof or rub-resistant. Carry cotton swabs, your lip color, and a small amount of face paint for quick corrections.
Keep the neck and chest design simple if your costume has a high neckline. Fabric rubbing against heavy makeup can cause smudging and may stain clothing.
Remove It Gently
After wearing detailed zombie makeup for several hours, aggressive scrubbing may leave your skin feeling uncomfortable. Start by massaging a cleansing balm or oil cleanser over dry skin to loosen heavy pigment. Rinse, then follow with a gentle water-based cleanser.
Repeat the cleansing step if necessary rather than using rough washcloths or harsh exfoliants. Remove prosthetic adhesive with the remover recommended by its manufacturer. Finish with a simple moisturizer instead of layering several strong skincare products immediately afterward.
Temporary staining from highly pigmented makeup may require another gentle cleanse the next morning, but avoid repeatedly scrubbing the same area.
Keep the Scare Skin-Safe
Use cosmetic products intended for the face and follow the label’s placement instructions. Not every bright pigment is suitable for use near the eyes. Craft paint, non-cosmetic glitter, and household adhesives don’t belong on facial skin.
Remove the makeup if you develop persistent burning, swelling, blistering, or eye pain. Seek appropriate medical care if symptoms are severe, continue after removal, or affect your vision.
Decorative contact lenses require a valid prescription and proper fitting, even when they don’t correct vision. Poorly fitted or improperly maintained lenses can increase the risk of scratches and eye infections. Never share lenses or buy them from sellers that don’t require a prescription.