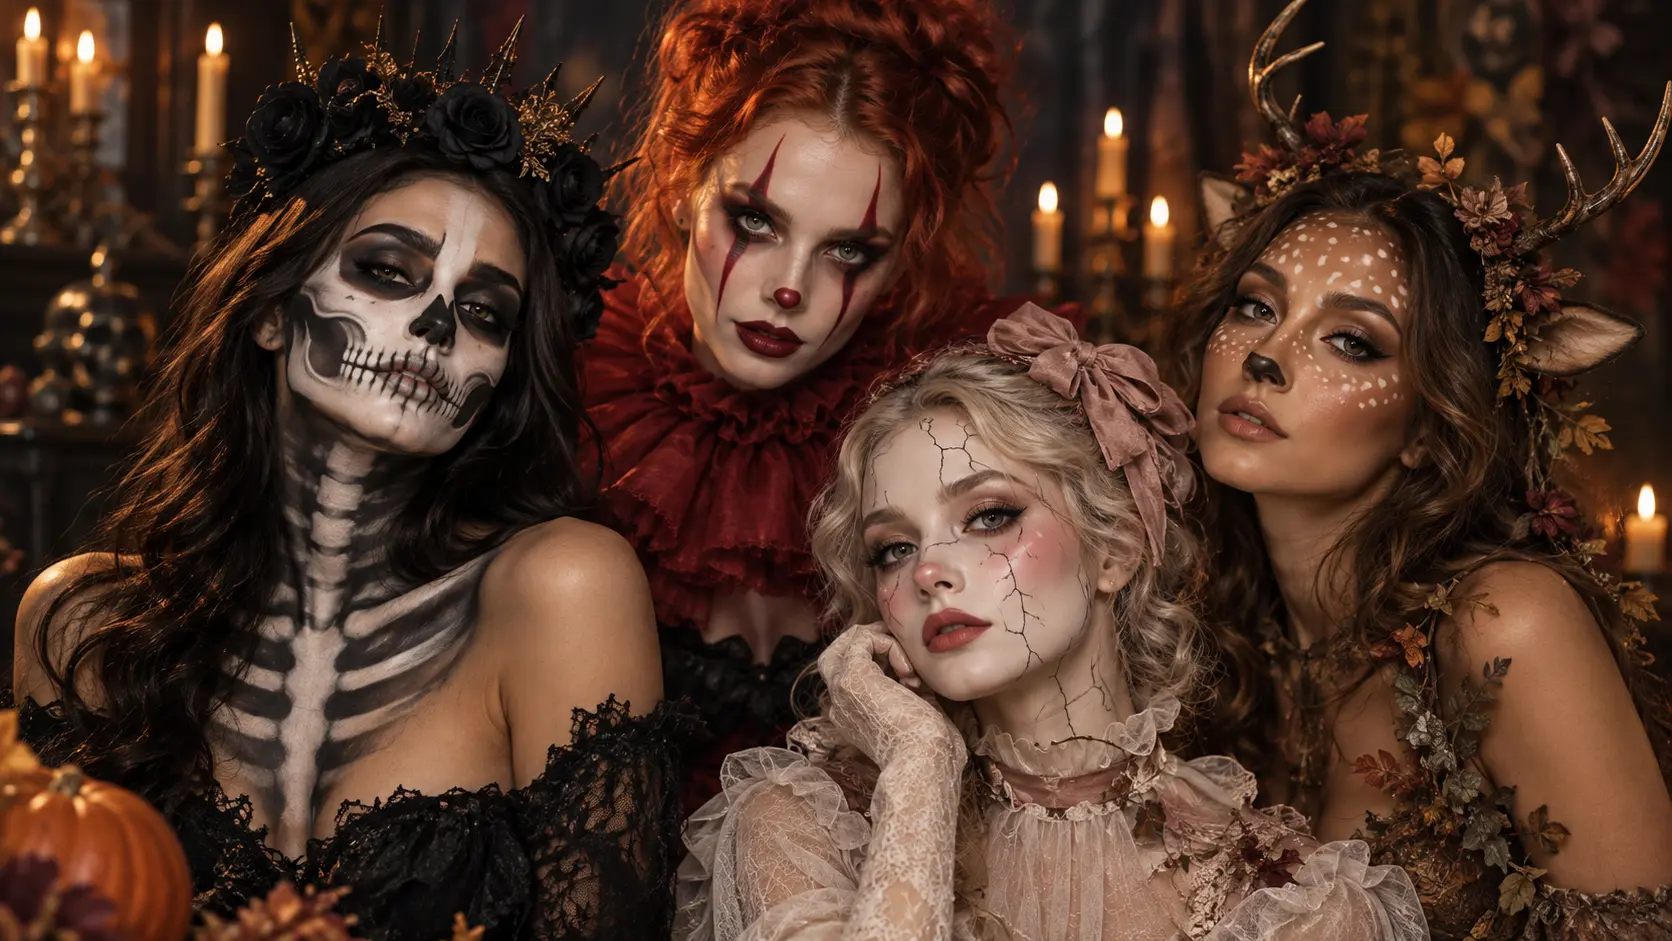
Halloween makeup often looks impressive in inspiration photos but becomes harder to recreate once you start working with dark pigments, fine lines, false lashes, and face paint. A successful design needs more than dramatic color. The placement around the eyes, nose, cheekbones, and lips must stay clear enough to show in photographs while still looking balanced in person. These 12 Halloween makeup ideas offer a mix of eerie, glamorous, playful, and fantasy-inspired options, giving you choices for different skill levels and costume styles.
You’ll find detailed skulls, sinister clowns, cracked porcelain dolls, woodland creatures, and other creative looks that can carry an entire costume without requiring an elaborate outfit. Each idea focuses on a distinct color palette, recognizable facial details, and accessories that support the character rather than distract from the makeup.
You can simplify the finer lines for a beginner-friendly version or build extra shading, texture, and special-effect details for a more advanced finish. Choose the design that fits your time and experience, test your products before the event, and practice the most detailed areas once so the final application feels controlled rather than rushed.
Create a Smoky Full-Face Skeleton
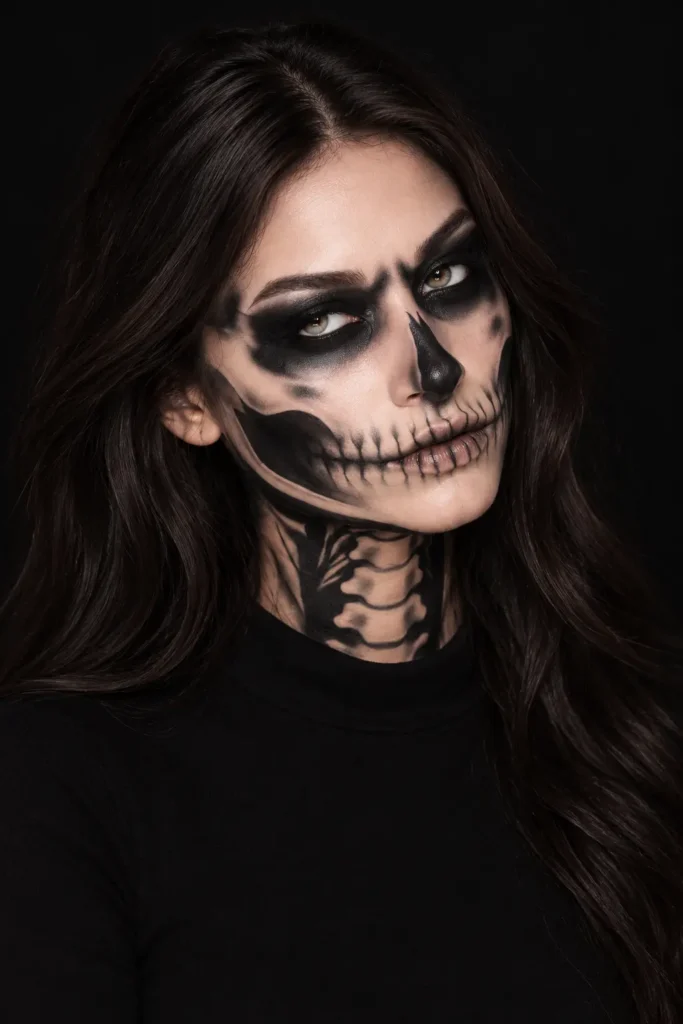
Picture a traditional skull look softened by smoky blending, realistic shadows, and a touch of beauty makeup. This version feels dark and dramatic, but it remains more flattering than a sharply painted black-and-white skeleton.
It is ideal for anyone who loves intense Halloween makeup and wants a design that works with a simple black outfit. The blended finish also makes small mistakes less noticeable, which is helpful if you are still developing your face-painting skills.
Begin with your usual complexion base. Blend black or charcoal pigment around the eyes, extending it toward the temples. Paint the tip and sides of the nose black, then shade beneath the cheekbones to create hollow-looking cheeks. Draw fine vertical lines across the lips before softly blending the edges.
Continue some of the shading down the neck to suggest vertebrae and collarbones. This creates a more complete effect without requiring a full costume.
Application tip: Use a small fluffy eyeshadow brush to diffuse harsh edges and create natural-looking depth around the eyes and cheeks.
Build a Shadowed Corpse Look
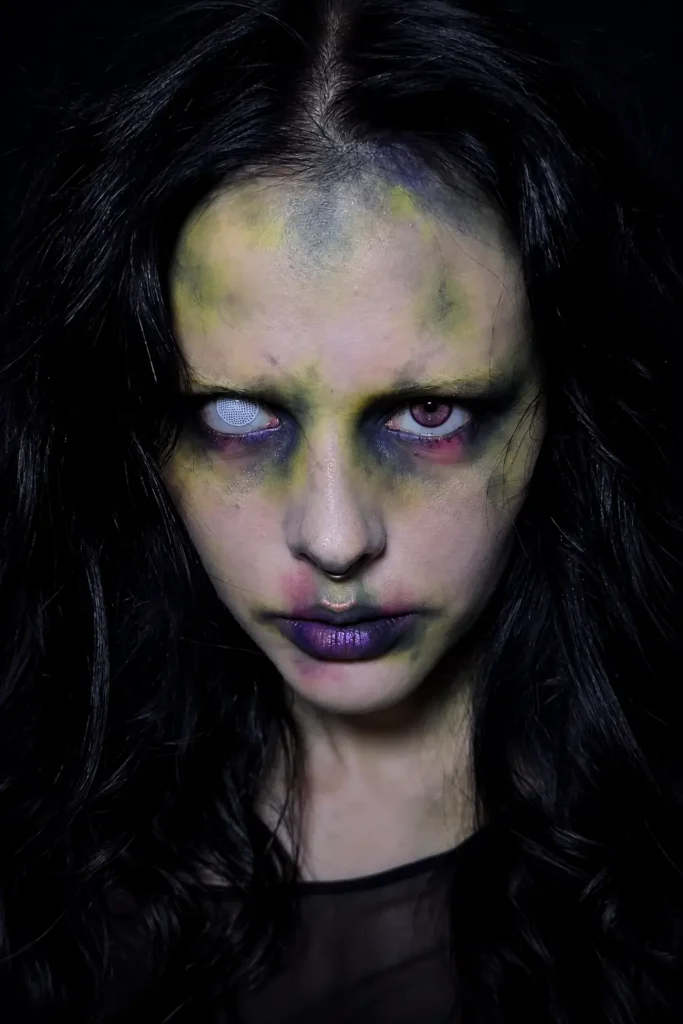
This look proves that imperfect blending can be an advantage. Uneven green-gray color, bruised purple shading, dark eye sockets, and messy black hair create a character that appears tired, eerie, and otherworldly.
Blend olive, charcoal, yellow-green, and muted purple across the face using a damp sponge. Concentrate the darkest shades around the eyes and temples, but allow parts of your natural complexion to remain visible. This creates a mottled finish instead of a flat layer of paint.
The shadowed corpse look is a practical choice for beginners because it doesn’t require precise linework. If one area appears uneven, you can soften it with a clean sponge or turn it into part of the design.
Watch Out: Keep powder and loose pigment away from the waterline and inner eye area.
Red-eyed vampire countess
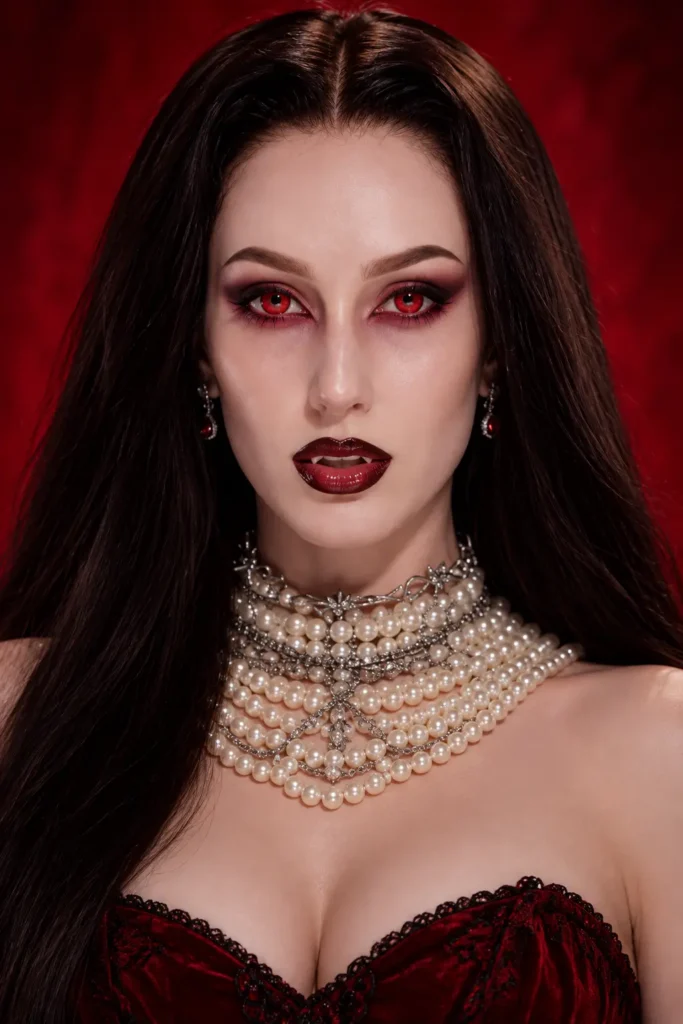
The second look centers on vivid red contact lenses, glossy blood-red lips, smoky cranberry eyes, and luminous pale skin. Long dark hair, pearl jewelry, and a velvet costume add an aristocratic vampire-countess finish.
This idea suits anyone who prefers elegant theatrical makeup with one unmistakably supernatural detail. It also photographs well because the red eyes, dark lashes, and reflective lips remain visible under dim party lighting.
Use a satin-finish foundation rather than an extremely flat white base. A small amount of cool-toned contour beneath the cheekbones can create structure without making the face appear gray. Blend cranberry shadow around the eyes and add black only along the lashes and outer corners.
Outline the lips with a dark burgundy pencil. Apply red lipstick inside the outline and press clear gloss over the center.
Watch Out: Red decorative lenses should come from a legitimate source and require proper fitting. Stop wearing them if you notice pain, redness, blurred vision, or unusual sensitivity.
Classic Deer Makeup With a Brown Nose
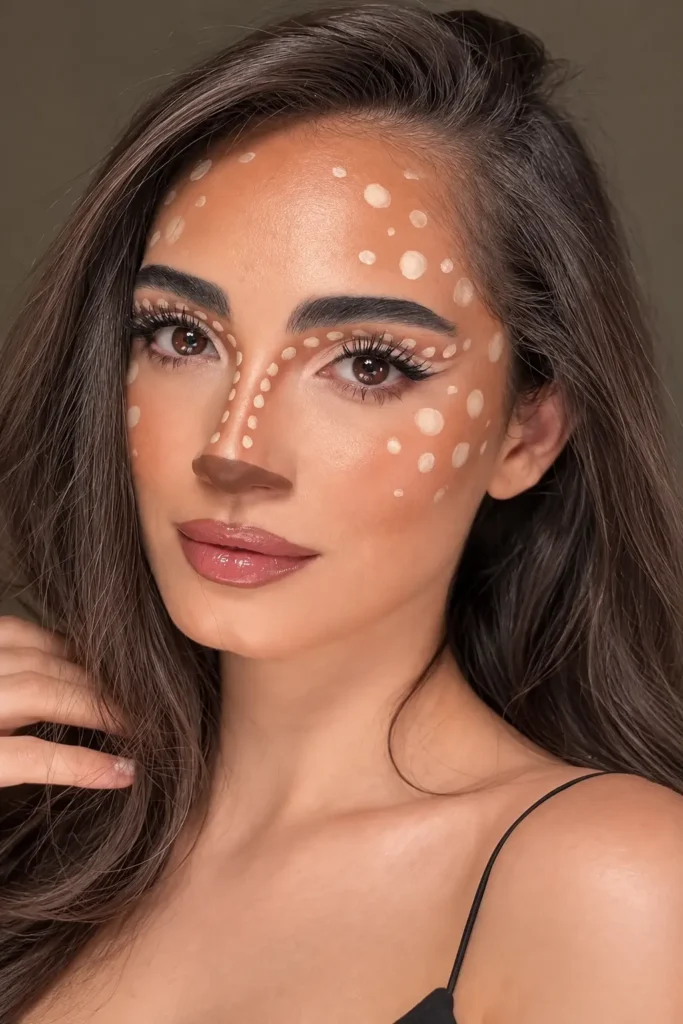
This is the fuller woodland look many people picture when they search for deer makeup ideas. White spots cover the forehead and cheeks, smaller dots lead toward the nose, and a shaded brown nose makes the costume instantly recognizable. Long lashes and glossy neutral lips add a polished finish.
It’s a strong choice if you want your makeup to carry the costume on its own. You could wear a plain top and still have a clear deer look in photos. The markings also give you room to adjust the result: use fewer cheek spots for a softer version, or add more forehead detail for greater impact.
Build the spots after your foundation and blush. For the nose, sketch a small shape with a matte brown pencil, then fill and soften it with a brush. Work gradually. A lightly shaded nose is easy to deepen, while a large dark shape can be harder to correct once the rest of your makeup is finished.
Creepy Half-Face Clown Makeup
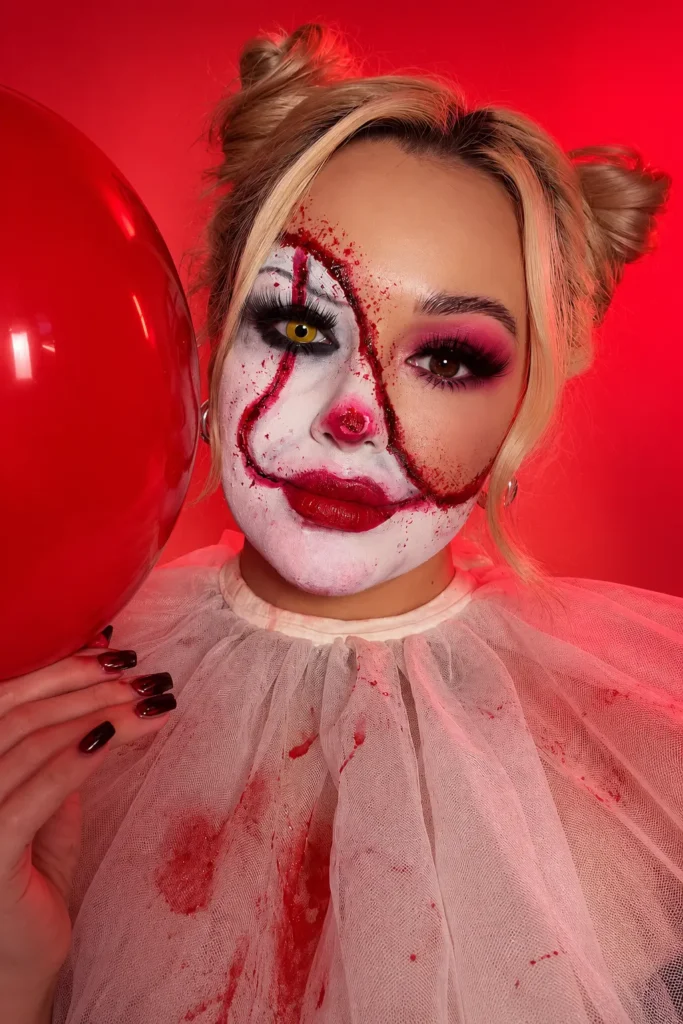
If you cannot decide between glamorous and scary makeup, combine the two with a creepy half-face clown design. This dramatic look divides the face into two contrasting personalities. One side features traditional beauty makeup with blended red eyeshadow, long lashes, and a clean complexion, while the other is covered with white face paint and distressed clown details.
Begin by applying your regular foundation across the face. Cover one side with white cream makeup, taking the color from the forehead down to the jawline. Use red face paint to create a pointed eye design and extend an exaggerated smile toward the cheek. Adding uneven edges, dark shading, and scattered red splatters gives the painted side a more unsettling finish.
A red nose connects both halves of the look, while glossy red lipstick adds a polished touch. For even more impact, consider wearing a colored contact lens on the painted side. Space buns, a ruffled collar, and a red balloon can complete the creepy circus character.
This scary clown makeup idea is especially suitable for Halloween parties and horror-themed photoshoots.
Sculpted Black Snake Eye Art

A glossy black snake curves from the forehead, crosses the eyebrow, and wraps around the outer eye in this dramatic design. Moss-green eyeshadow and an extended black wing connect the serpent to the eye makeup, while scattered clear rhinestones add small points of light.
This snake eye makeup look suits Halloween parties, fantasy-themed events, and editorial beauty photography. It’s especially useful if you want a large, recognizable snake instead of tiny scale details.
Sketch the body with a pale pencil before applying black pigment. Create the snake with connected curves, making the middle of its body slightly wider than the head and tail. Add a narrow gray or white highlight along one edge to make the flat painting appear raised.
Keep the lips neutral so the detailed eye area remains the main feature. If you add rhinestones, place them around the snake rather than directly over its painted body.
Dramatic Black Bat-Mask Eyes

This bold design surrounds the outer corners with wide black bat wings, creating the impression of a miniature eye mask. The upper wings curve toward the eyebrows while pointed lower sections extend beneath the eyes. A smoky lower lash line connects everything and makes the design feel intentional.
This bat eye makeup look suits Halloween parties, themed photo shoots, and anyone who prefers dark, high-impact makeup. It works especially well when paired with defined brows and burgundy or black-cherry lipstick.
Use gel liner to sketch the outline before filling it in. Keeping the bat points thin and evenly spaced helps the design remain elegant rather than heavy. If perfectly matching both sides feels difficult, let each wing vary slightly while maintaining a similar overall size.
Taurus Skull Makeup
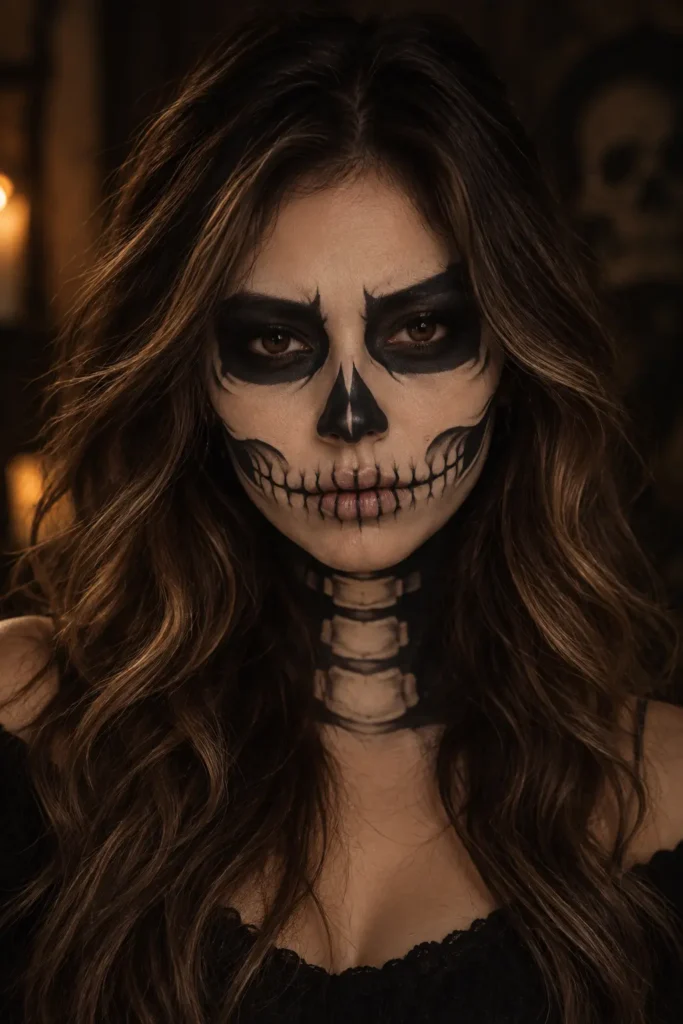
This Taurus-inspired skull makeup uses rich black, bone beige, and muted brown to create a strong, grounded look. Blend matte black pigment around the eyes in wide sockets, keeping the darkest color close to the lash lines. Paint a narrow skeletal nose, then draw fine vertical teeth across the lips instead of covering the mouth with one heavy black shape.
Soft brown contour beneath the cheekbones gives the face realistic depth without making the design appear flat. Extend several bone shapes down the neck, and pair the makeup with long brown waves and a simple black top. Matte products work best because glossy paint can reflect flash and hide the finer details.
Aries Clown Makeup
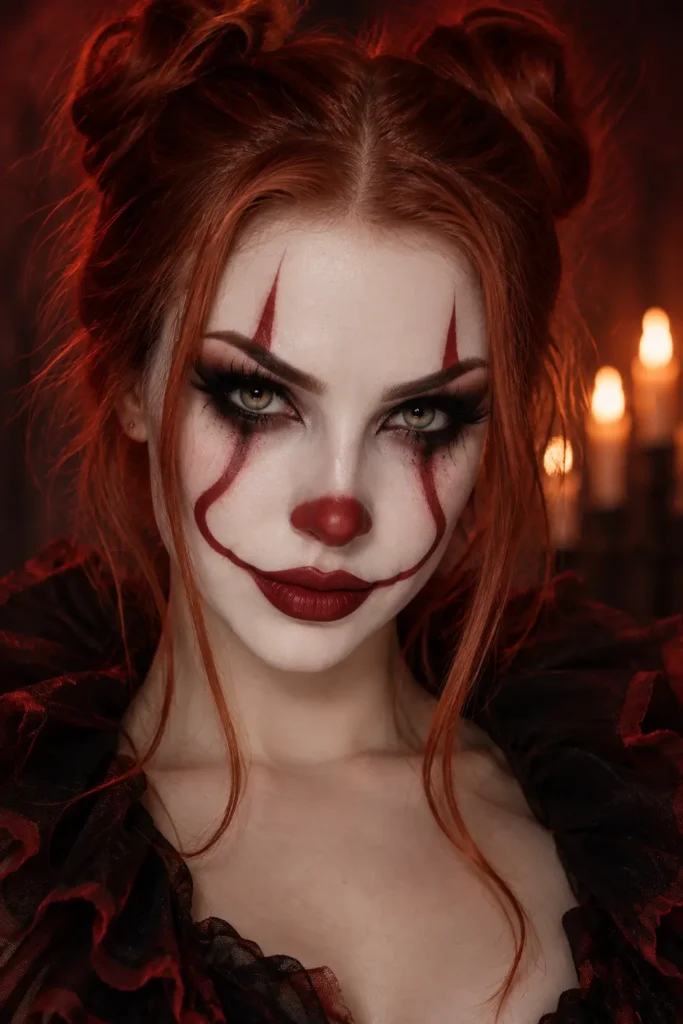
An Aries clown look should feel bold, fiery, and slightly theatrical. Start with a smooth pale base, then build sharp smoky eyes using black, burgundy, and deep brown shadows. Draw narrow red points above the eyebrows and continue the color beneath the eyes, keeping both sides balanced rather than perfectly identical.
Add a rounded red nose and extend thin smile lines from the corners of the lips toward the cheeks. Deep red lipstick gives the mouth definition, while dramatic lashes prevent the eye makeup from disappearing under warm evening light. Finish with red hair, a black-and-red ruffled collar, and minimal jewelry so the painted details remain the main focus.
Haunted Porcelain Doll Makeup
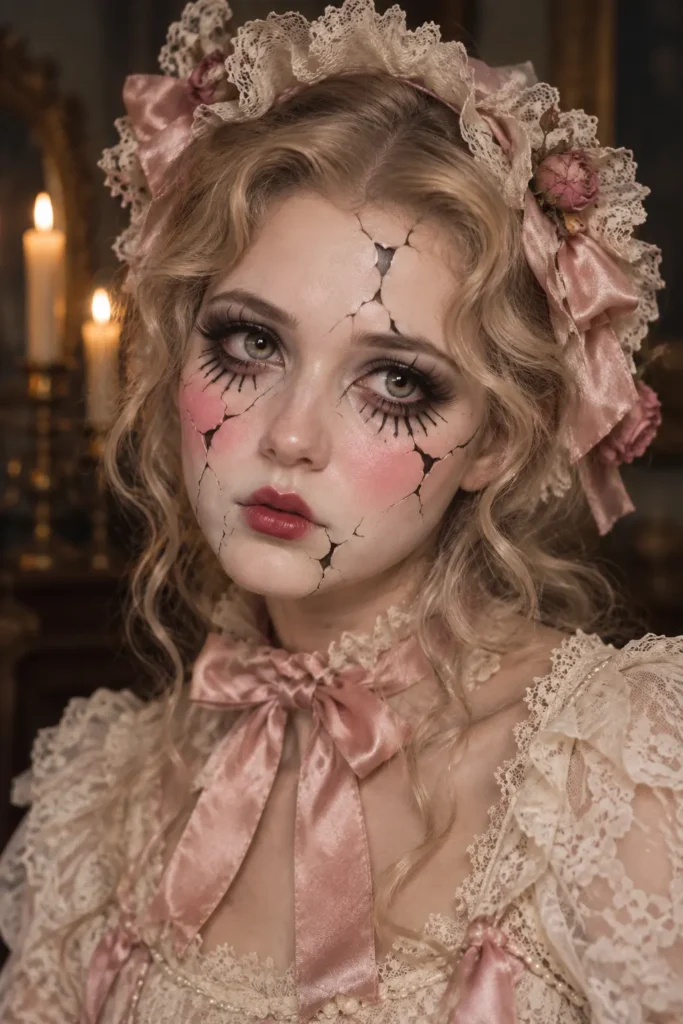
This haunted porcelain doll makeup combines delicate vintage styling with carefully placed cracks. Apply a pale satin-finish foundation rather than flat white face paint, which can look chalky and emphasize dry patches. Sweep rose blush across the center of the cheeks and use a small brush to paint thin, irregular cracks around the forehead, eyes, and jaw.
Long upper lashes and painted lower lashes make the eyes appear rounder. Keep the lips small and softly defined with dusty rose color. Blonde curls, lace trim, satin ribbons, and an antique-style headpiece support the character without making the outfit feel overloaded. Leave some clear skin between the cracks so every detail remains visible.
Enchanted Woodland Deer Makeup
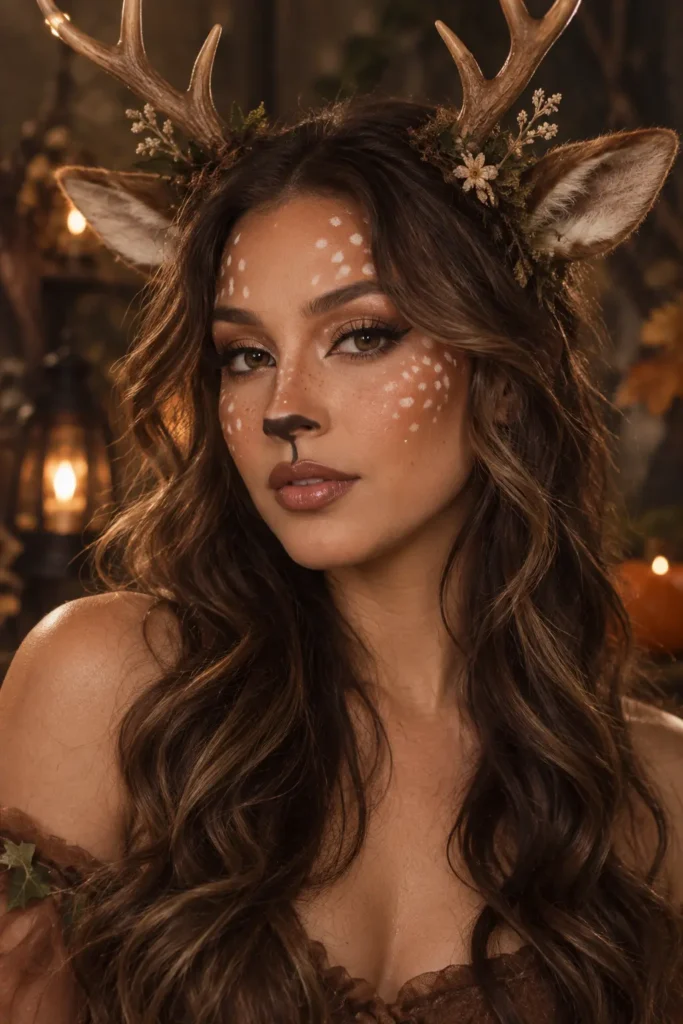
Woodland deer makeup creates a softer Halloween look while still giving the face a recognizable character. Use warm brown bronzer around the forehead, temples, cheekbones, and sides of the nose. Add small white fawn spots in loose clusters, varying their size so they don’t resemble evenly spaced polka dots.
Paint the nose with dark brown or black cream pigment, then draw a short line toward the upper lip. Winged liner, long lashes, and soft bronze shadow give the eyes a wider, alert shape. Complete the look with lightweight antlers, deer ears, and small dried or artificial flowers. Secure the headpiece firmly, but avoid heavy antlers that become uncomfortable after an hour.
Create a Pretty Red-Eye Zombie
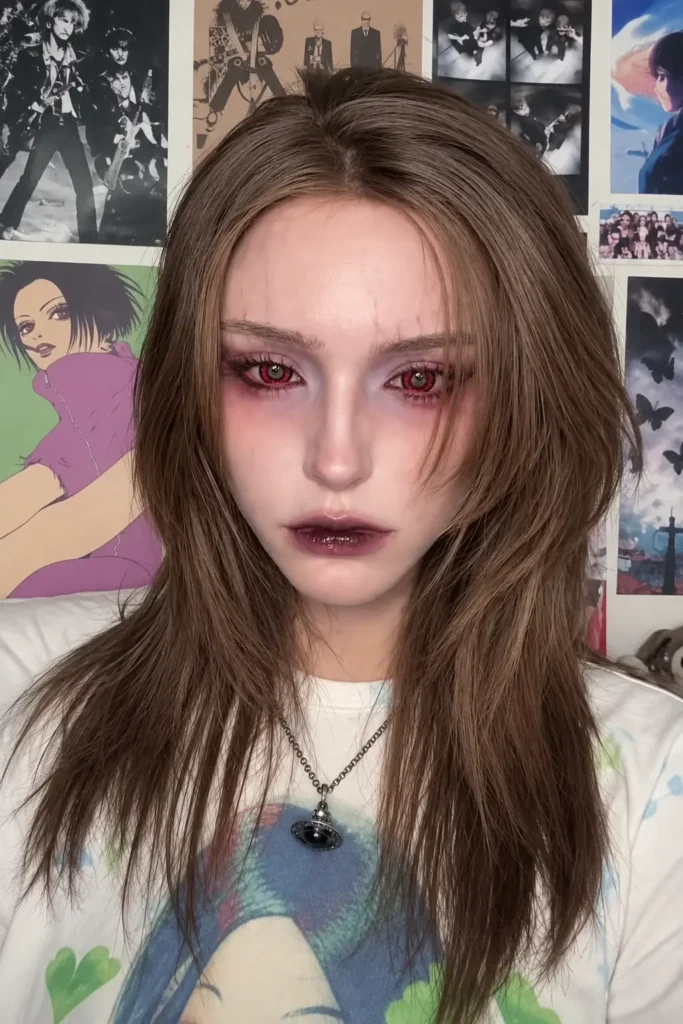
Soft lavender eyeshadow, red-toned eye makeup, blurred under-eye color, and glossy dark lips create a zombie that still feels polished. The effect is subtle enough for beauty lovers who want an eerie look without hiding their entire face.
Keep the complexion close to your natural skin tone. Blend mauve or plum shadow around the eyes, then add burgundy liner for extra intensity. A dark berry lip stain topped with clear gloss creates the appearance of a deeper, slightly unsettling lip color without painted wounds.
The look works particularly well with loose hair, a casual outfit, and one or two carefully chosen accessories. It’s simple, but the unusual eyes make it instantly recognizable.
Eye Safety: If you want decorative red lenses, obtain properly fitted prescription lenses through an eye-care professional. You can also skip lenses and build the effect using makeup alc direction. Use translucent powder to set areas that may crease or transfer.
What to Consider Before Applying Halloween Makeup
Prepare the skin with a lightweight moisturizer and allow it to absorb before applying face paint. Thick creams can cause water-activated or cream pigments to slide, especially around the nose and mouth. Test unfamiliar products on a small area at least 24 hours before wearing them across the face.
Use cosmetic-grade pigments rather than craft paint. Keep red, black, and glitter products away from the waterline unless the label confirms they’re safe for use around the eyes. Apply thin layers, set cream products with matching powder, and carry cotton swabs for small corrections.
Common Halloween Makeup Mistakes to Avoid
Poor lighting is one of the main reasons detailed makeup becomes uneven. Apply the base in bright, neutral light, then check the finished look under the warmer lighting you’ll encounter at a party. Very dark rooms can flatten black makeup, so leave narrow areas of natural skin or pale pigment between dark sections.
Avoid drawing every line too thick. Fine teeth, cracks, and facial contours usually look more realistic when built gradually with a small brush. It’s also worth taking a test photograph with and without flash, since reflective products can appear much brighter on camera than they do in a mirror.